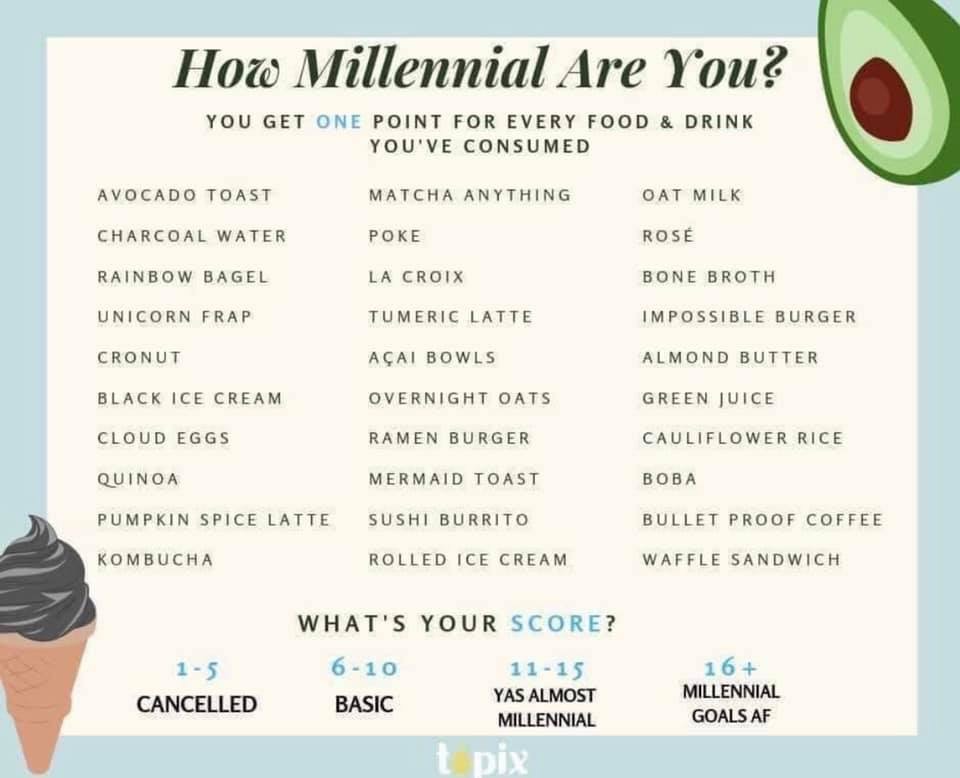
These are great questions and ones I bet you never thought you would ask? Ever heard of cloud eggs and mermaid toast? Until last week, I hadn’t… that is when I stumbled across this list of foods – how millennial are you? So I started with a score of 17 and took it as a challenge… since last week I am now at 20 and plan on trying a few more of the 30 on this list.
If you follow me on social media you can see what I try and what I think of it – if you don’t yet follow me – click the buttons below and come on the food adventure with me!
Up for a food adventure of your own?
In this article I will post recipes for the very simple and quite tasty cloud eggs and mermaid toast so you can try them on your own if you like… let me know what you think!
Ingredients for Cloud Eggs
Eggs
parchment paper
salt
cooking spray
Directions for Cloud eggs and Mermaid toast
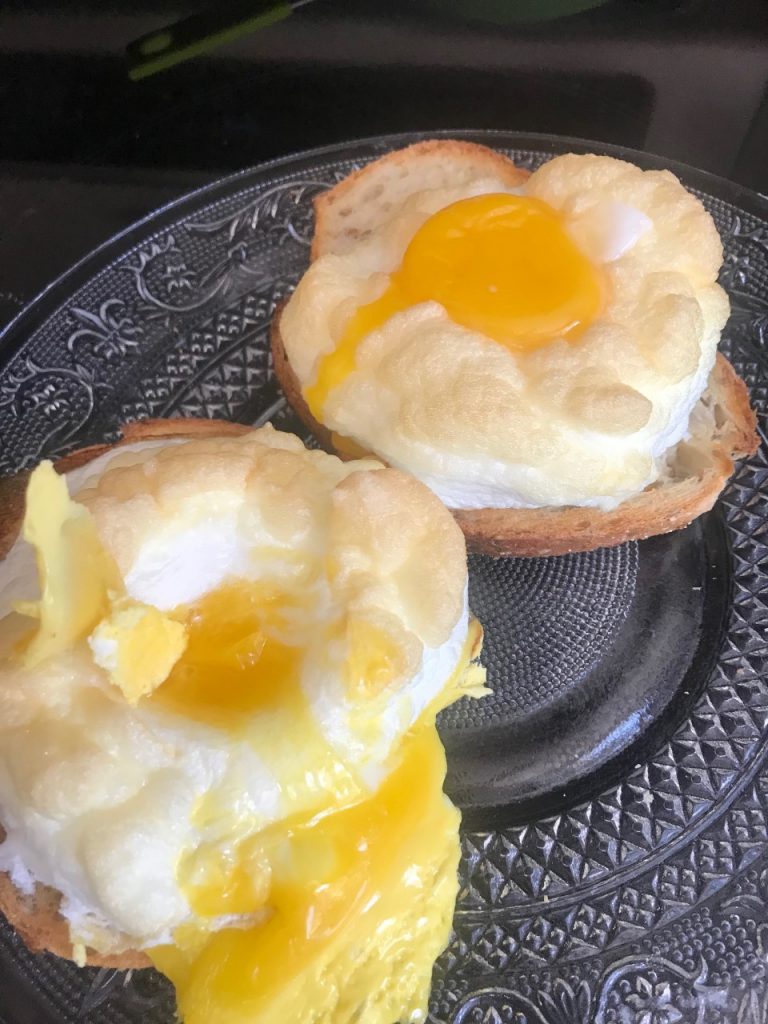
first… Could Eggs!
Preheat oven to 350 F. Separate white and yolk of eggs and place each yolk into a separate glass or bowl. Place all whites into a large bowl with some salt and whip with a cake beater until stiff peaks form. Place bu spoonfuls on cookie sheet prepared with parchment and sprayed with cooking spray. (number of lumps of egg white should equal number of eggs used) and place a well in the middle. Bake 6 minutes and remove from oven. Place a yolk in each well and put back in the oven for 4 minutes. Et Voila – could eggs.
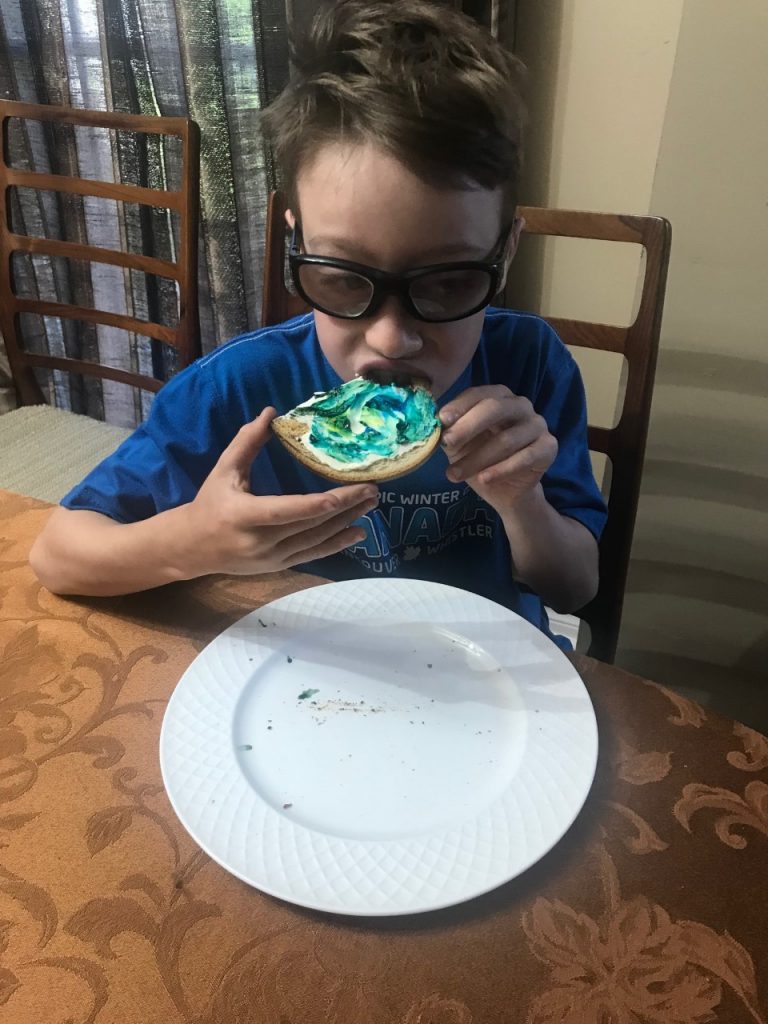
My son Leo said it was like eating a marshmallow but not sweet. Good but weird really.
Next: Mermaid Toast
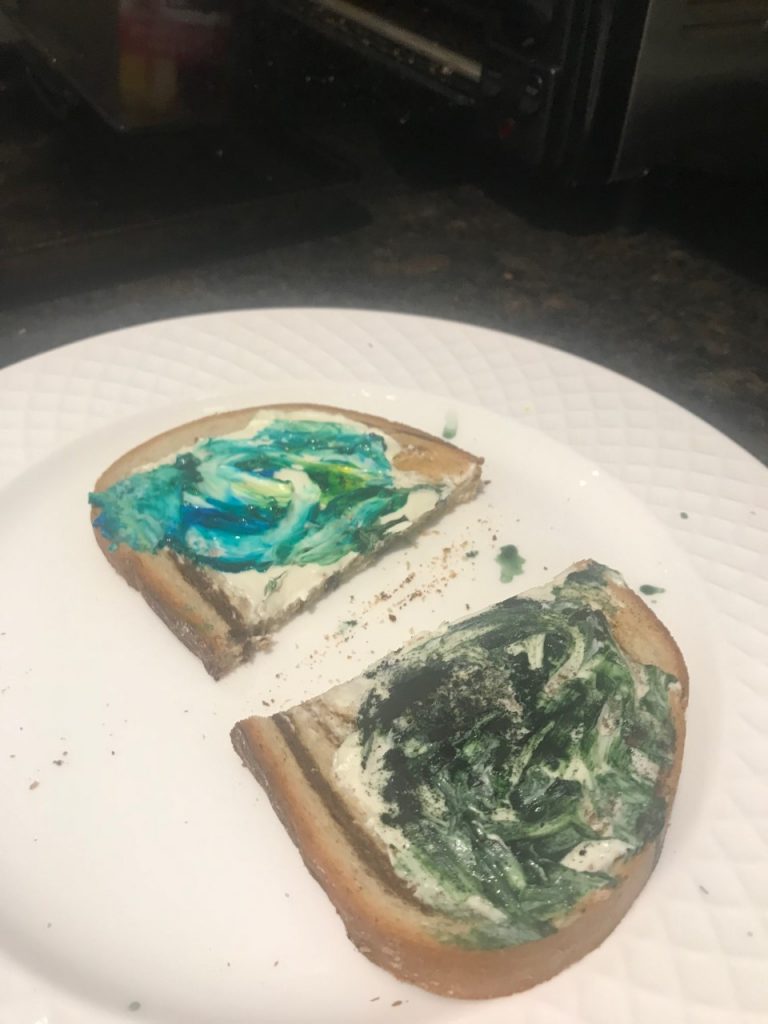
Ingredients
bread for toast
cream cheese
liquid chlorophyll
Spirulina powder
Directions for Mermaid Toast
This one is easy. Make toast. Smear with cream cheese. Sprinkle with spirulina and chlorophyll and swirl around so it looks pretty – then eat – On one of mine pictured I added a drop of blue food colouring for fun for Leo – yep, Leo ate it and he actually liked it!
Give it a shot – it does require a shopping trip to a health food store or Whole Foods…
Hope you have as much fun with this as I am having!