Ever heard of Kombucha?

You may very well have as it is all the rage right now. It is a fizzy tasty fermented tea that you can buy in bottles at many health food stores and upscale markets… even Costco sells it now because it has become so popular.
One issue it is $4 a bottle on average (ouch)
Wanna learn to make it for pennies a bottle? Ok maybe a nickel since we don’t have pennies anymore…
If so read on…
What you’ll need:
This kombucha recipe (and my first scoby) came from a patient’s girlfriend so thank you so much Candace! This is posted with permission…
-Black tea (you can experiment with other teas but always have a back up scoby incase it gets mold, I’ve only used black tea and never had mold)
-Cane Sugar (can use other sugar but this one works best for the majority of brewers)
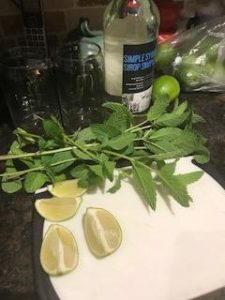
-Flavouring of your choice (berries, ginger, hibiscus, orange are some examples. This part is experimenting and finding what you like best)
-Non-metal spoon
-Kombucha starter
-Filtered water
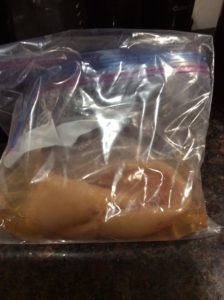
-Scoby
-Container
-Vinegar
-Bottles
What the hell is a Scoby?
According to the Google:

“Scoby” is actually an acronym: Symbiotic Culture Of Bacteria and Yeast. And that’s exactly what it is! A scoby is the living home for the bacteria and yeast that transform sweet tea into tangy, fizzy kombucha — think of the scoby as the coral reef of the bacteria and yeast world.
You can make your own scoby and if you want to see this article:
https://www.thekitchn.com/how-to-make-your-own-kombucha-scoby-cooking-lessons-from-the-kitchn-202596
It is easier to get one from someone – that is how I started. Each batch or two of Kombucha you should have a baby scoby and can give away your older one (though I suggest keeping a back up scoby in a ‘hotel’ (vessel with the scoby and some of the post brew tea and yeast) in case you somehow grow mould.
Why is Kombucha so popular
So, it is fizzy and tasty. On top of that it is very healthy. A way way better option than pop.
Kombucha is a fermented tea so it comes by its bubbles all naturally – fermented products have probiotics in them. Probiotics are important for gut health and their lack or imbalance in the microbiome of the gut have been tied to obesity, anxiety and depression and many more health related problems. So, we should all be taking probiotics and eating probiotic rich foods like fermented one (kombucha, sauerkraut, kim chi, apple cider vinegar to name a few) as well as pre-biotic foods (foods that feed the microbiome like dandelion greens, onions and jicama).
Ok, on to the fun stuff…. the recipe.
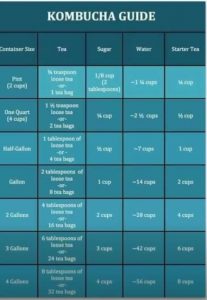
Here is a Helpful chart
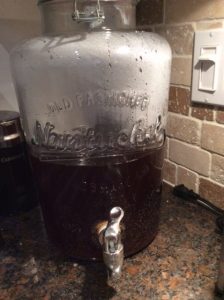
Kombucha Instructions
- Make sweet tea according to chart on page 3 depending on the size of your container and starter given (you can add majority of the water directly to the container, just keep some to make the tea).
- Steep the tea for 10 minutes, add the sugar to dissolve.
- Allow tea/sugar mixture to cool before adding to the container.
- Add the kombucha starter to the container.
- Add the scoby to the container.
- Cover with breathable cloth and secure with rubber band.
- Let sit for approximately 7 days (this varies depending on the temperature of your house and sweetness preference).
- At day 7 you should see a baby scoby has formed on the top of the brew (looks like a thin cloudy white layer).
- Remove the scobies and set aside in a container (the mother scoby will always be thicker than the baby scoby).
- Taste test the brew (should taste similar to apple cider, if it is too sweet put the scobies back in and allow it to sit for a couple more days. If it tastes too vinegary, shorten the ferment time next brew).
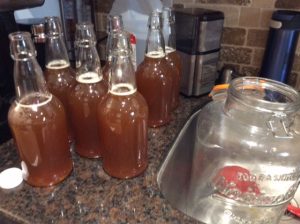
- When you are happy with how it tastes its time to bottle.
- Give the brew a big stir with a non-metal spoon to distribute the yeast evenly (this will help with carbonation).
- Remove kombucha starter for the next brew if using a 2-gallon jar this would be 4 cups worth.
- Bottle the remaining kombucha leaving about an inch of headspace on the bottles. (swing top bottles are preferred, if using another type of bottle be sure to check on it during the second ferment).
- During the second ferment is where you can experiment with different types of flavours. Keep in mind the sugar content of what flavours you decide to use. (for example: if using mango and ginger, the mango will be ready before the ginger)
- Secure the bottles with an airtight seal, if using screw top bottles make sure they are as tight as possible or your kombucha will be flat.
- Allow to sit on the counter for 2-4 days (swing top bottles are safe to leave, screw top bottles will need to be checked. You can leave the bottles longer but they may need to be burped, you can do this by slightly opening the cap and sealing it again to release some of the air)
- Once the bottles are ready, transfer to the fridge.
- The bottles will have formed little baby scobies in them; I personally strain them out before I drink it. They are safe to swallow if you don’t mind the texture.
- Make a new brew and repeat the steps, add the baby scoby to your new brew.
- Mother scobies can be stored in a hotel (separate container of backups). Store in cupboard put enough kombucha tea in to cover the scoby. If you do get mold you can use the starter tea in your hotel to make a new batch.