Essential Oil Lip Balm

This is the first full week of February and it kicks off Doctor with a Heart month at the practice.  So what are we doing that is different?  We are trying to do little things that show we care- care for the world, care for our patients and care for ourselves and families.

What are we doing that is special?

On February 1st I cut off all of my hair – ok well around 13 inches anyways – in order to donate to a charity that makes wigs for kids with cancer.  More on this later – I think we have chosen the charity we are just waiting to hear back on how to go about making the donation.

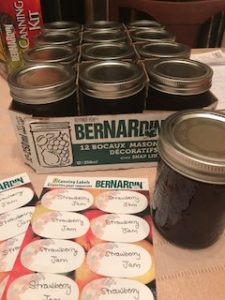
February also marks our patient appreciation month.  I have give aways for every patient who comes in in February – I have made (yes MADE) essential oil lip balm for everyone in this shortest, coldest, lip chappy-est month of the year. You can make your own too in case you miss it but just come in and get one from me to avoid the hassle.

Actually this lip balm was given to me by my friend Sjoukje Remark – she is an RMT and my essential oil guru.  She made it for me and later gave me the recipe.  I loved it so much I made it for all of you.  It has to be the cleanest, safest, chemical free-est and loveliest lip balm I have ever used.  I had to make some.

And of course I labeled it “Badass Chiropractic Lavender/Peppermint Lip Balm” so that is awesome.


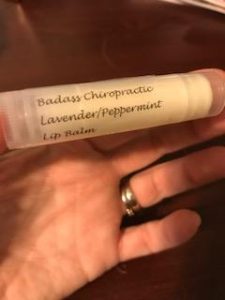
Come on in and get one this February, your lips with thank you (lavender is amazing for the skin and peppermint feels tingly and fresh).

Here is the recipe:

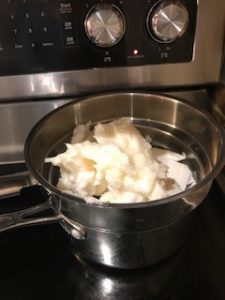
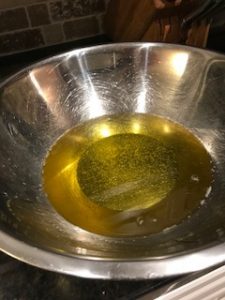
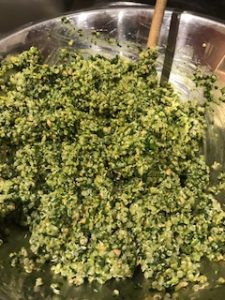
1/4 cup Cocoa butter

1/4 cup coconut oil

1/4 cup beeswax

2 tsp calendula oil

2 drops vitamin E oil

60 drops of essential oil (I used 15-20 lavender and 30-40 peppermint)

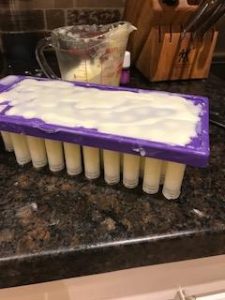
Melt all ingredients over a double boiler and add essential oil. Pour into tubes and allow to cool. Cap and Label that Badass stuff.


Steak and Spinach Spicy Salad (Keto)

Stumbled upon this combo this week because it was what I had in the fridge.  Actually I way over cooked three steaks and Ryan wouldn’t eat them.  I hate wasting food so I found another way – this became my lunch all week and I looked forward to it each day. You can also do it with perfectly good medium rare steak left overs…. my steak was well done eye of round that was pre-seasoned on the outside with a peppercorn mix from the store.  I upped the anty with red pepper infused olive oil and sriracha mayo… Me likes it hot.

Ok, you can tone it down but I loved it.

I even made my own dressing (it was really simplified because who has time…)

If you like spicy follow my recipe otherwise tone it down a bit.  I ended up eating a whole box of baby spinach this week. Yay for iron and calcium intake not to mention folic acid.

Spinach Salad:

As much baby spinach that will fill you up for lunch

half a well done steak cut in small chunks

Cucumber cut in quarters

half an avocado scooped out and chunked

sriracha mayonnaise to taste

top with coconut smiles (I got these at Costco and they are way addictive)


Dressing:

1 tablespoon red pepper infused olive oil

a splash of apple cider vinegar


Home made Chocolate (Keto)

Yes, Keto Chocolate is possible.  Even recommended to get your fats in a really yummy way.  This recipe was given to me by a friend who did not want credit because it was given to her.  So thank you who ever made this one up!

I will be using this thing for molding the chocolate – I got it on Amazon for under $20 but you can do make it on a cookie sheet with parchment paper and break it up afterwards.

Try adding fresh berries (blue or rasp) or nuts (not in my house – allergies) or coconut for added interest.  You can even at chilies or curry if you want to get fancy.  There are also some cooking and food grade essential oils you can get from Young Living now you can add to it – They make a chocolate that has some oils in it that are amazing I bet I will try to replicate at some point. The possibilities are endless… And I shall try them ALL I tell you!!!

Ingredients:

1 cup cocoa butter

2 cup cocoa powder

1/4 cup honey

1/4 tsp vanilla

Note: you can half the honey and add 5-10 drops of stevia to decrease the sugar for Keto – I bought these chocolate flavoured stevia drops.

Melt cocoa butter in a double boiler and remove from heat as soon as melted – whisk in honey till smooth and add vanilla and stevia if you are using it. Whisk in cocoa powder until smooth.  Pour into molds or cookie sheet lined with parchment paper. Top with toppings or sink in fruit if in molds.  Place in freezer or fridge to harden and store in the fridge.

Easy peasy!


Broccoli and Stilton Soup

Once upon a time in the distant past I took a trip to London (and Paris) to visit friends of my parents and a friend of mine.  This story takes place in England.  On Salisbury Plain, in fact…

It was a dark and stormy day (really). And my ‘Aunt and Uncle’ dropped my friend and I off at the famous site on Salisbury Plain – that’s right the amazing Stonehenge.  It was our only available time to visit and it was raining really hard so my Aunt and Uncle decided to wait in the car for us because they had been there before and they didn’t want to do battle with the rain.  So anyways, my friend and I went out there with almost no other people and took a walk around Stonehenge, pretty well alone. When does that ever happen? When it is raining sideways on Salisbury plain apparently.  It was quite amazing.  It was also really cold and wet.

Once we were done we went for lunch in a pub nearby.  We all had a Broccoli and Stilton Cheese soup that is maybe the best soup I have ever had. Ever. Maybe it was because I was cold and wet and hungry (hangry but holding it in really), or maybe not.  I have been trying to copy it ever since.

This is the closest I have come and it uses broccoli stalks that I collect and freeze as I use broccoli to feed the family (yep you read that right).  I cut the very end off and cut them in chunks and collect it in a large Ziploc freezer bag – once I have a full bag I can make a soup!

So here it is- hope you enjoy:

1 full bag of broccoli stalk (from freezer)

some broccoli florets (if you have them – I rarely put them in)

2 potatoes pealed and cut in chunks

1 wedge stilton cheese

1 L chicken or veggie stock

salt to taste.


Really that’s it.  I throw it in a large pot and make sure the stock covers the veggies and add water if it doesn’t.  Boil until everything is soft and then transfer to blender to puree in batches.

Super Yummy and amazing in this super cold weather.

Enjoy!


Scarsdale Chicken and Kale Salad (Keto)

So once upon a time there was a doctor named Dr. Scarsdale and in the 1970s or 1980s there was a fad diet called the Scarsdale diet. I have no idea what this diet consisted of at all but I know my Dad was on it and lost a bunch of weight with this as well as exercise at the time. Mostly he was on his stationary bike for at least an hour per night in front of the TV in the basement.

The only thing that I actually remember about this diet was this recipe which was likely modified over the years by my mom.  It is super easy and makes amazing juicy and healthy Chicken legs every single time.  It became a staple in our household and I still make it to this day.

Actually I made it yesterday…

Ok, so why did I pull this one out ?  Well as you may or may not know already I will be hosting Wellness Wednesdays on my clinic facebook page every Wednesday night at 9 pm eastern in January 2018.  Week 1 is couch to 5 k (mostly because I have to get my tush running again) and then week 2 is the Keto diet with Penny Hounsome, trainer extrodinaire.   You can find it here:

I thought I would get a jump on the keto thing and start a couple weeks early so I could report on my progress (and it keeps me accountable too – bonus!)

So back to the recipe:

Scarsdale chicken

-a bunch of skin on chicken legs

-chicken broth

-paprika

Put chicken legs in oven proof dish.  Pour chicken broth over so it comes up at least mid way or higher on each leg. Sprinkle paprika over top of whole dish. Bake at 350 F for 45 minutes.

That’s it. Really.

Juicy chicken legs every time.

Kale salad pictured above

kale

flavoured olive oil (I used red pepper)

cucumber

avocado

apple cider vinegar

Cut up leaves of kale (small is best in my opinion). cut in cucumber, avocado and pour olive oil and vinegar over top). Eat.


Seriously uncomplicated and super yummy.


Slow Cooker Coconut Curried Chicken and Cauliflower Rice

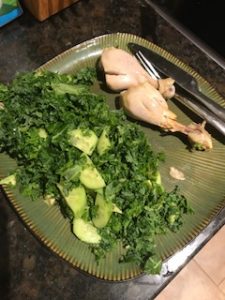
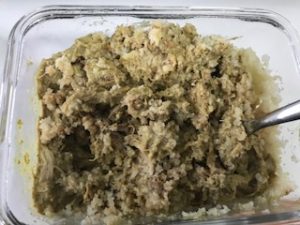
So I love Curried Chicken.  This recipe is paleo and Whole 30 and originally came from a website called I breathe I’m Hungry (www.ibreatheimhungry.com).  Originally it had potatoes and jalapeno peppers as well as other things in it but if you have been following my blog and recipes at all you will know that I tend to modify recipes.  Mostly because I’m lazy or somehow I have forgotten to buy an ingredient.  So here is my version. It is way easier than the original and I make it during the winter at least twice per month… I like it even better than the original and I serve it over Cauliflower rice too – my recipe for that is below. I often double or triple the recipe because I never feel like I can get enough of this for lunch.

Coconut Curried Slow Cooker Chicken:

Marinade:

8-12 boneless skinless chicken thighs

1 tsp garlic powder

1 tsp onion powder

1 Tbsp spicy yellow curry powder

2 Tbsp olive oil

1 tsp kosher salt


For the curry:

2 cups coconut milk (I use 1 can milk and 1 can coconut cream)

1 Tbsp (or more to taste) curry powder

coconut flour to thicken


Oil and spices for marinade in large Ziploc bag and mix well.  Add chicken and mix up to coat all.  Leave in fridge over night or several hours.  Just before you are ready to turn on crock pot put all ingredients listed under curry into it and mix well with whisk.  Heat a pan and coat with cooking spray and brown marinated chicken on both sides quickly then place in slow cooker and make sure chicken is covered mostly with coconut milk.  Set slow cooker for 6 hours on high and walk away (best part).

Is super tender and amazing when you get back to it! That’s it really!!!


Cauliflower Rice:

1 head cauliflower – florets removed

olive oil

salt to taste

Place florets into food processor and grind until small pieces resembling rice. Place with oil in deep pot and fry until tender – you may need to place lid on pot – don’t over cook or it will get mushy.

That is it for this one too!!!

This is a super easy one and is really yummy. Love love love this one.


Yellow Split Pea Dhal – Modified… from About.com via Katie Mellor

So in the winter I love soup and comfort food.  This recipe is kind of a combo   
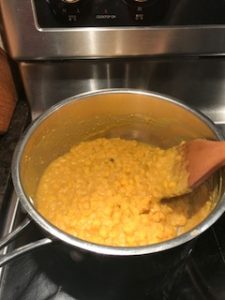
of both… It came originally from one of my closest friends Katie – via the website About.com.  It is vegetarian and can be vegan and has a ton of turmeric in it which is amazing for you – said to do everything from help prevent Altzheimer’s Disease and Cancer as well as a natural anti-inflammatory.  Anyways I don’t eat anything unless it tastes good.

This one tastes good.

Love making up a batch of it and taking it for several days for lunch.

Here is the recipe from About.com and following it are my modifiers (how I make it for myself)…

1 cup yellow split peas, uncooked

2 cups water or vegetable broth

1 tsp tumeric

1/4 tsp cayenne

1/2 tsp salt

1 Tbsp margarine

1 1/2 cumin (whole seeds or ground)

2 whole cloves

dash pepper

In a large pot bring peas and broth to a slow simmer and add turmeric, cayenne and salt. Cover and cook 20 minutes stirring occasionally.  In a large skillet or pan heat onion, clove, cumin in the margarine and cook 4-6 minutes.  Add onion and spices to peas and allow to simmer at least 5 mire minutes.

Serve with rice or alone in soup bowl.


My modifications:

I do not add onion but fry the spices alone in the margarine (onion makes me toot and I think my patients wouldn’t appreciate that… Certainly Ryan, my husband, doesn’t).  I double the broth and cook much longer until the peas are mushy and less formed… just my preference… see how you like it.

Hope you make it and enjoy!

Make your own Essential Oil Body Butter

I decided to make body butter this year as some of the Christmas Gifts I am giving out – The one pictured is using Young Living’s Gentle Baby Essential Oil which is terrific for new moms and babies and helps with Mother/Baby bonding, is good for cracked nipples from nursing and is great for skin recovery (stretch marks) but also makes a great hand cream for dry skin.  I decided to give this one to people who handle lots of babies (and Moms) – Midwives and Pediatricians that I know.

You can make any ‘flavour’ body butter and it is surprisingly easy.  The hardest part was ordering ingredients (which I got online in bulk from a company called New Directions Aromatics here in Mississauga – I now have enough for several batches and will definitely make more!)

This is surprisingly easy to do yourself at home and makes a beautiful fluffy cream that smells great.  Best of all you know exactly what the ingredients are and they are all super healthy and natural.

Here is how:

Body Butter Recipe:

1/2 cup Shea Butter

1/2 cup Cocoa Butter

1 cup Coconut Oil (I had this in the cupboard from the health food store)

1/8 cup Calendula Oil

1/8 cup Jojoba or Sweet Almond Oil (no nuts in mine or in my house so…)

1 teaspoon Vitamin E Oil

20-40 drops Essential oil of your choice (depends how strong you wish it to smell)

Melt Shea , Cocoa Butter in a double boiler and add Coconut Oil.  Stir until melted.  Add liquid oils and essential oil and stir.  Pour into mixing bowl and refrigerate a few hours until it is a  soft solid.  Take out and beat with a hand blender until it is light and fluffy.  Put in to containers for use.


That is it!

some really nice oils to use are Peppermint and PanAway for pain or Lavender for relaxation.


Hot Quinoa and Spinach Salad

Ok, so here is one that I totally made up.  I love it and make it for lunch lots but you may hate it so if so sorry!!!  I never do this make up your own recipe thing.  This one came about because I was looking for something yummy yet healthy to make that still tasted like comfort food.  For me this one does it.  Also was limited to what I had in the kitchen, and frankly the large box of baby spinach was looking like it was going to go off soon so in it went.  You can eat this as a side but I usually make it my whole meal for a few days in the week when I make this recipe.  I can get three lunches for me out of the recipe – of course the hubby and child wont go anywhere near it. Its way WAY too green.  Full of Calcium, protein and other amazing stuff…

So here is the Recipe:

1 cup uncooked quinoa

2 cups of water

1 large box of fresh baby spinach

1-2 chicken breast or even better: left over roasted chicken from grocery store/Costco

1-2 avocados

Siracha sauce for taste (I use rooster sauce)

Salt to taste

Cook quinoa in water according to directions and set aside.  In a large bowl of a food processor puree all spinach, avocado and chicken and mix together well.  Place quinoa and spinach/chicken mixture into a large mixing bowl and mix together until uniform colour.  Add Siracha sauce and/or salt to taste.  Serve warm – does well heating up in the microwave and will store for a few days in the fridge. Also freezes well in batches.


Hope you like it – I do – Made it last week!


My Mom’s Strawberry Jam


So my mom passed away several years ago.  She was my best friend and I miss her every day.  This jam was one of her signature things – though she made the freezer jam version.

We used to go strawberry picking every year with family friends (you know who you are I and K) to Whittamore’s farm.  We would wash, clean, store and freeze the strawberries for later use – we had a ton of it in the chest freezer in the basement and some of it would turn into strawberry jam.  I remember almost falling into that freezer as a kid fishing out jam and strawberries.  Good memories.  I am smiling just typing this.

I used to come home from school and return to Waterloo or Chicago with at least 3 bottles of jam…  This past weekend I made, an properly preserved, 24 jars of my mom’s strawberry jam.  I do it to give out at gifts for the holidays – and to eat at home… It is great on toast – or ice cream (yum!).

Amazingly, Mom’s strawberry jam recipe somehow ended up on the box of pectin – wonder how that happened (ya, she wasn’t a chef but she followed recipes well – like me).  This summer, and the one before, my son Leo and I went to Whittamore’s farm and picked strawberries – froze them like mom used to, and they went into the jam last weekend.

If you are interested in doing this on your own, here is the recipe (from Bernardin’s pectin box):

  • 5 cups crushed strawberries
  • 1/4 cup lemon juice
  • 1 package Bernardin Pectin (I use the powdered not liquid)
  • 7 cups sugar (I use a bit less)

Yield is 8 jars of jam….

here is a link on how to sterilize and seal jars properly:

https://www.epicurious.com/recipes/food/views/to-sterilize-jars-and-lids-for-preserving-102234

Once filled I also re-submerge the jars (full and sealed) and boil 20 minutes.

Super tasty and will last for 1 year on the shelf when canned properly.

I used to post on facebook when I was making jam…. I don’t know how many pots I have burned the bottom of – so be careful!  It’s ok  – self-deprecating posts are generally appreciated on facebook.

Have fun jamming!