Poor Posture and Pro Pointers

Posture – good, bad and ugly

As a chiropractor I get a lot of questions about posture.  Many times I have patients coming to see me specifically for help with their posture.  Unfortunately there is no quick fix.  In this post we will go over some of the reasons for poor posture and some trick, tips and tools you can use to help to correct or improve it.

Poor posture reasons

So most of us sit way way way too long – in front of computers, in the car or on the commute, at home in front of the TV  – and when we do it we don’t always have the greatest way of sitting either.  We tend to slouch, poke our heads forward and round our shoulders as well as lose the natural curvature of our lower backs.

Add to this looking down all the time at cell phones and tablets (and typing blog posts on your laptop on the couch in front of the TV) and we have a recipe for pretty awful posture.

You end up looking like how you sit or stand most of the time.  Here is how it looks – rounded shoulders, gut protruding and chin protruding… not pretty and not healthy for your spine.

Image result for poor posture

we end up with short muscles in certain spots, and locked joints…and it makes it difficult then to straighten up.


So what can you do about poor posture?

  • make sure that your desk at work is ergonomically as correct as possible
  • limit use of phone and tablet
  • do exercises to correct shortened muscles and strenghten weak ones (these need to be specific for you – if there were generic ones I would list them for you here)
  • get chiropractic adjustments so you have a chance of moving the stuck spinal joints
  • use devices for retraining at your desk or at home – a good example of this is a Posture Medic- I recommend these for my patients but there are others out there

Image result for posture medic device

Here is a quick video I made about this cool contraption and how I instruct patients how to use it.


Instant Pot recipes for the beginier (aka me)

So I got a new Instant Pot

It was Amazon Prime day in July… I couldn’t help it. I bought an instant pot to my husband’s chagrin. (we already have way too many kitchen gadgets).

I am hopeful this new gaget will replace my slow cooker – It should, and take it’s cupboard space.  ANNNNDDD I hope it solves another problem – the one I have with forgetting to take out meat to thaw in the morning.  With the instant pot you can cook from frozen in 30 minutes – its true! I tried it!

At first I was a bit scared of the pressure cooker feature – while I never had one growing up my mom regailed me with stories of exploding pressure cookers in the 70’s – she was scared, and passed it to me.  Hence I have never had one.

Nowadays they make these things way safer… still though at first I was scared and ran out of the kitchen.  Old habits die hard.

Ok so here are two beginer recipes I have tried and one I will try this week:

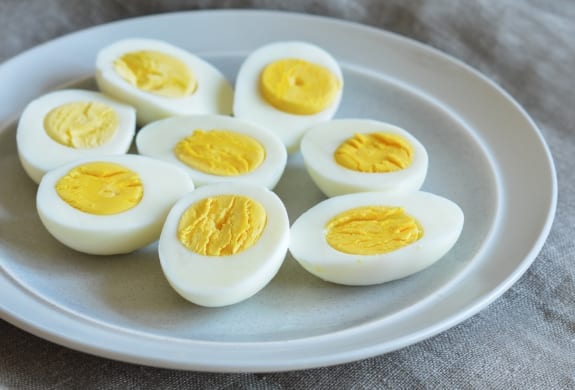
Instant Pot hard boiled eggs

This one is so simple its crazy.  And it makes the perfect, most easily peeled hard boiled eggs.

Image result for hard boiled eggs

A perfect starter place…

Place eggs in the instant pot on the rack. Put in 1 cup of cold water into pot.  you can cook 6-8 eggs at a time – close the lid of the instat pot and make sure the steam valve is closed and in the sealing position – cook on high pressure for 5 minutes (manual or pressure cook setting).

When it beeps do a quick release of the steam (careful not to burn yourself! I always do this with silicone oven mitts on…) and submerge the eggs in ice water for 5 min so they dont over cook – use tongs!

Done! perfect and easy to peel every time!

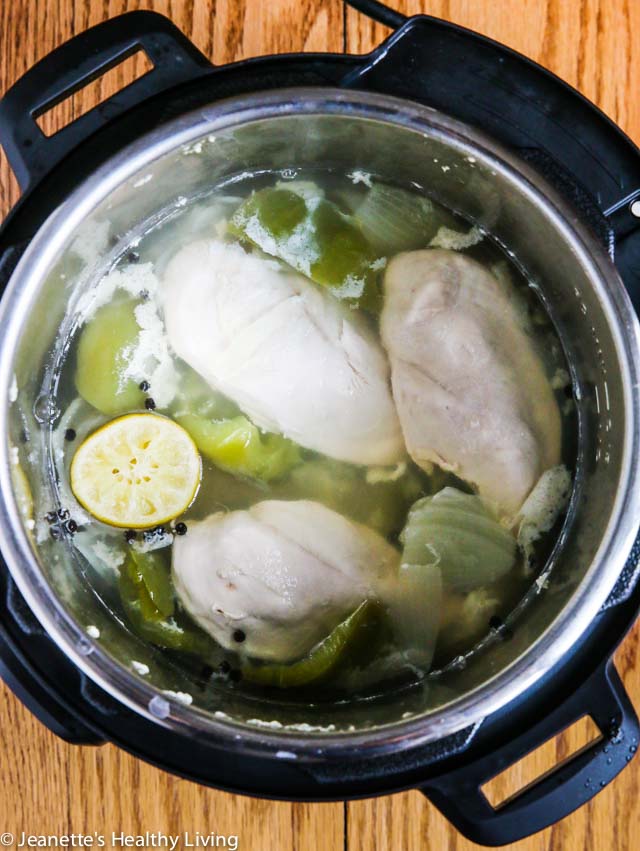
Instant pot poached chicken breasts

Also super easy!

To make it easier make sure you freeze the chicken breasts individually – then you don’t have to fight to separate them – and they do need to be separated!

Ok so you can put in lots – you can stack the chicken breasts but make sure to separate – I did 6 the first time!

Image result for poached chicken instant pot

Steps:

put frozen chicken breasts in pit

add 1 cup of water or chicken broth and season with salt and pepper

Close the lid of the instant pot and move valve to sealing and press manual or pressure cooker setting and set timer to 10-12 minutes (12 was too long for me last time).  When it beeps let the pressure release naturally for 5-10 min and then release the remaining pressure – so easy!

If you do longer on the cook time the chicke shreds nicely for chicken salad.  Shorter and you get perfectly poached chicken… just make sure the internal temp of the chicken is 180F when you are done to make sure it is cooked through if you are worried.

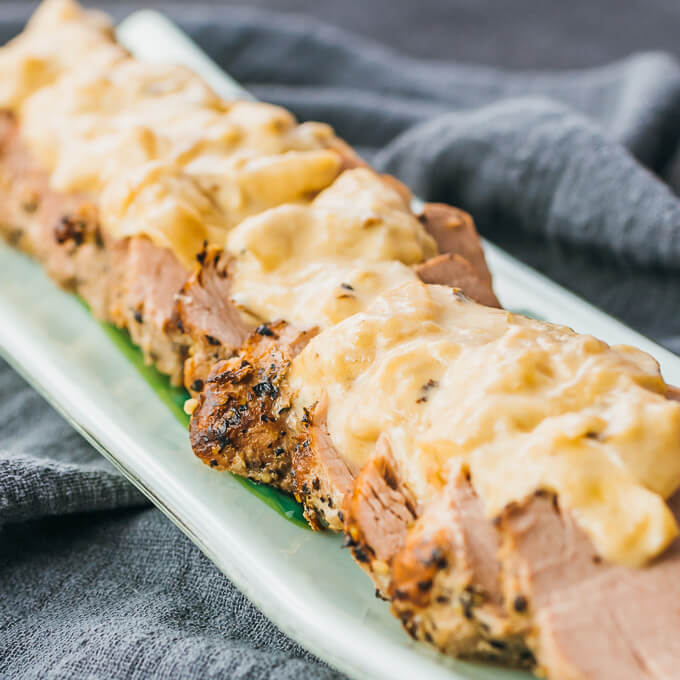
Keto Pork Tenderloin in the instant pot

This one I haven’t yet tried as of the writing of this post – I will be trying it this weekend or early next week though… credit to this blog and more instant pot keto goodness here! https://www.savorytooth.com/instant-pot-pork-tenderloin/  I totally stole this whole thing from there…

cooked instant pot pork tenderloin drizzled with mustard sauce and onions

Ingredients

  • 1 pork tenderloin (1 – 1.5 pounds)
  • 1 small onion thinly sliced
  • 1/2 cup water
  • 1 tablespoon olive oil
  • salt and pepper

For the sauce:

Instructions

  1. Cut the pork tenderloin in half so it’s half as long as before. If unseasoned, season all sides with salt and pepper.
  2. Turn on the pressure cooker’s saute mode for medium heat. When the display reads HOT, add olive oil to coat the bottom of the pot. Add pork and cook until golden brown on one side, about 5 minutes. Flip to cook the other side for a few minutes. Transfer the pork to a plate.

  3. Add onions and cook for a few minutes, stirring frequently. Turn off the saute mode.
  4. Add water, stirring and briefly scraping up any brown bits stuck to the bottom of the pot. Return the pork to the pot, nestling it on top of the onions.
  5. Secure and seal the lid. Cook at high pressure for 4 minutes, followed by a 10 minute natural release. Make sure to wait the full 10 minutes; do not open even if the pressure is completely released before 10 minutes have elapsed.
  6. Uncover and insert a thermometer into the thickest part of the tenderloin — it should read 140-145 F. Transfer the pork to a cutting board and let it rest, where it will continue cooking. Do not slice yet.

  7. Turn on the saute mode. Add heavy cream and mustard to the pot, stirring together. Bring to a boil. Let the sauce boil for 8-10 minutes to thicken, stirring frequently. Turn off the saute mode and stir for a minute to let the boiling subside. Stir in parmesan cheese until melted.

  8. Slice the pork into thin slices and serve onto plates. Pour the sauce on top.


Healthy Homemade Popsicle Recipes

Trying to get the kids to eat healthy cool treats?

Ok then this is the post for you – for these healthy homemade popsicle recipes all you need in the way of equipment is a food processor and popsicle molds.

Here are some that incorporate good fats, fruit and little or healthy sugars!

Lime Avocado Coconut Healthy Homemade Popsicles

Healthy Homemade Popsicle recipe 1

1 large ripe avocado

1 can coconut milk

1 whole lime zest

juice of one lime

1 tbsp. maple syrup or stevia

1 tsp chia seeds

Blend avocado and milk until very smooth and add the rest of ingredients and blend until mixed well.  Pour into molds and freeze. Serves 6-10.

Image result for avocado and coconut popsicles

Strawberry Peach and Yogurt Healthy Homemade Popsicles

Healthy homemade popsicle recipe two

1 quart strawberries (pureed)

3 peaches skinned/seeded and pureed

Honey

Plain yogurt sweetened to taste with honey or vanilla yogurt

Add 2-4 teaspoons of honey to strawberries and peaches to taste.  Layer purees in popsicle molds alternating with yogurt and ending with fruit puree and freeze.

Image result for healthy popsicle


Watermelon and Lime Healthy Homemade Popsicle

Healthy homemade popsicle recipe #3

1/2 a watermelon cubed

Juice of 1-2 limes

1-3 tablespoons of honey (to taste)

Add all to processor until smooth and liquid and pour into popsicle molds.

Freeze until solid (6-8 hours)


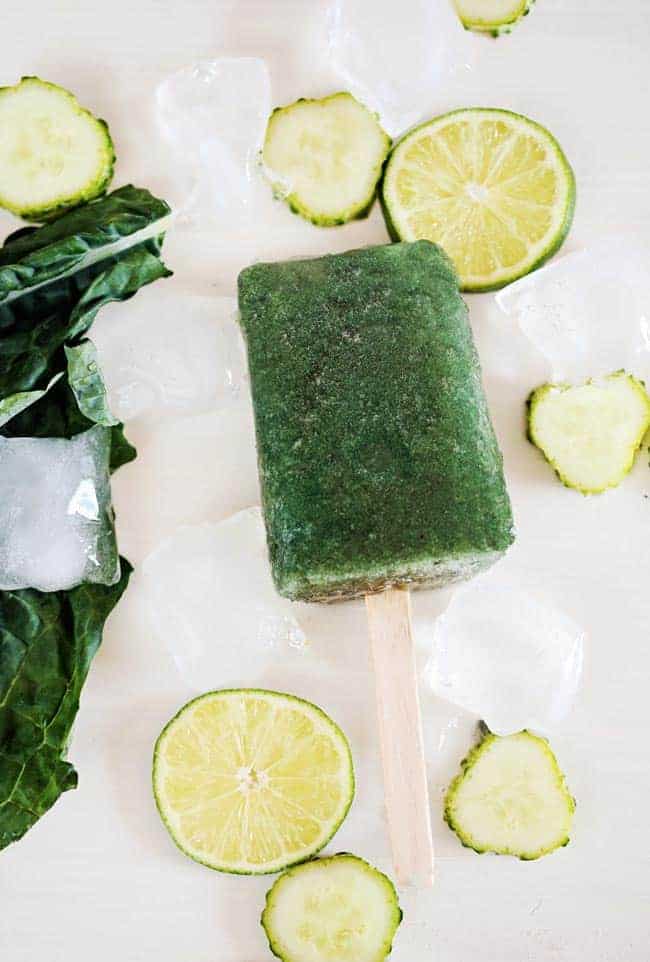
Kale Smoothie Healthy Homemade Popsicle

1 cucumber cut into chunks

4 leaves of young Kale (or substitute spinach) chopped roughly

1 banana

1/2 cup coconut water

juice of 1 lime

1 tablespoon honey


Blend all ingredients together until smooth, pour into molds and freeze

Kale Detox Popsicles | 3 Veggie Popsicle Recipes

I hope you really enjoy these – I have heard that the silicone popsicle molds are really the best for getting the popsicles out easily – I plan on buying some soon – another way to do this old school is to pour the popsicle stuff into ice cube trays, cover with saran wrap or foil and then stick in a popsicle stick through the foil so it is supported and freeze… easy peasy!

Yummy Drink Recipes for Summer

Beach Drinks

Some background on how we came across the yummy drink recipes: So while on vacation this year during the first week of July, my family spent time at my In Law’s home. The once lived in Toronto but have retired and sold their house in the city, renovated the cottage, and now live in beautiful Port Elgin Ontario full time.  We have instructions to call this the cottage in perpetuity.

While there this year with my family, in laws and 15 year old niece Sydney, Syd and I decided we needed beach drinks.

And pineapple shaped glasses we found at Walmart for $3.50 (side note – apparently they are at the Dollar store for way less – perfect).

But who doesn’t need pineapple glasses for the beach?

So we came up with a few different recipes (2 appropriate for the 15 year old and one just for the over 19 crowd) – here they are:

Watermelon, Lime and ginger slushy yummy drink

Yummy Drink number 1 ingredients:

4- 6 cups of watermelon cubed (for slushy freeze these first)

juice of 3 limes

1/4 teaspoon fresh ginger grated

image1.jpeg

Place watermelon and ginger in blender in batches and blend till smooth – pour through strainer and add lime juice, stir and serve with more crushed ice or ice cubes in super cute pineapple glasses.

*side note – yes I realize that the glasses are pineapple and fruit is watermelon – pretend this is somewhat ironic somehow…


Pineapple coconut milk smoothie yummy drink

Yummy drink recipe number 2 Ingredients:

one pineapple cut into chunks and frozen

2 bananas

2 cans coconut milk (full fat)

1 orange (fresh juice and zest of whole orange)

Place all ingredients into blender and blend till smooth – serve in cute pineapple glasses.

*side note – pineapple glasses more appropriate here.


Yummy Drink for over 19 crowd:

I can coconut water

1-1.5 oz Malibu rum

serve over ice or crushed ice in super cute (yet ironic) pineapple glasses.


Hope you enjoy (and if you drink the one for the over 19 crowd please enjoy responsibly!)

Life’s a Beach: the health benefits of going to the beach

Beach day! Yay!

Today’s post is a bit different.  It is the eve of the long weekend and it has me thinking of fun and sun and beach… so today I decided to write about some of the health benefits about going to the beach.  You can even use this blog post as an excuse to get to the beach – hey, Doctors orders!

Image may contain: ocean, water, outdoor and nature 

(art by Allyson Schmidt-Reeves  www.allysonreeves.ca )

Health benefits of going to the beach

So we all know we as humans, for the most part, like the beach or waterfront for some reason.  There must be some good reasons… actually there are and many of them have huge health benefits.  So here we have it, in no particular order my list of the health benefits of the beach:

Stress relief

Ok, I lied – this one is definitely number one.  Many of the people who will eventually receive or read this post met me at first because I gave a talk in front of them at work about stress.

Nature (like the beach, ocean/water or lake and forests) have calming effects on us human people.  Listening to the surf, sticking your toes in the sand and playing in the sun have stress relieving benefits for sure.  Ever been totally stressed out after a beach day? Ya, doesn’t happen much…

Earthing

speaking of sticking your toes in the sand… ever heard of earthing?  It is the act of walking barefoot on the earth.  The number one place we all do this because it is socially acceptable is on the beach.  (But this can be done anywhere).  Walking on the earth is purported to facilitate a negative ion exchange between the ground and the person which apparently has health benefits.  Whatever, its relaxing.  I always feel distressed when I do it and the sand is good for your rough calloused feet. So give it a shot!

Vitamin D levels

In just a few minutes on the beach in a bathing suit you can get your daily vitamin D replenished by your skin.  Your skin makes cholesterol into vitamin D with UV exposure so get out there – not too long with out sunscreen though – be sensible!

Exercise

Lots of opportunity to exercise on the beach – lovely for long walks, great for jogging, splashing, playing Frisbee, throwing a ball, digging, making sand castles (lifting some and bending), swimming, playing volleyball… the opportunity to exercise is endless and super varied – don’t just sit there (at least not for all of the time – some of the time definitely sit there and unwind!!!)

Spirituality

Big bodies of water and nature and surf provide opportunity for gratitude and connectedness to something larger than ourselves.  Take a minute to meditate and feel like you are part of something larger than yourself…

Canada Day Strawberry Cake!

Strawberry Season is upon us!

Happy Canada Day! One of my patients just posted this recipe and said I could repost it here because it looks soooooo amazing – I have not yet made it but maybe next week when I get some farm fresh strawberries.  Anyway, who wouldn’t like a strawberry cake?  Annnnd its Red and White just in time for Canada Day! Photo Credit to my Patient L.M.!

Image may contain: food

I remember as a kid going strawberry picking each year with my mom.  This year my fave farm has closed and I am not sure where to go so I may actually skip it for the year so I can figure it out…. sad I don’t have that place to go to anymore but such is life…. thank goodness there are still lots of strawberry farms around the GTA! If anyone has a favourite please tell me!

Ingredients

Here are all of the things you will need for this Strawberry Cake:

Strawberry topper:

1/2 c sugar

2 tbsp. corn starch

4 c fresh quartered strawberries

1 tsp vanilla

Cake:

2 c flour

1 tbsp baking powder

1/4 tsp salt

4 eggs at room temp

1/2 c melted butter

1/2 c vegetable oil

1 c whole milk at room temp

1 tsp vanilla


Instructions

Strawberry Cake here we come!

Grease and flour a 10 inch round (or 9×9 square) cake pan and pre heat oven to 350F. Mix corn starch and 1/2 c sugar and sprinkle over strawberries as well as vanilla. Toss together and spread over bottom of pan.

Cake batter: sift flour and baking powder together and set aside.   In the bowl of an electric mixer beat eggs, and sugar together until foamy.  Mix together butter and oil in a measuring cup and add slowly to egg and sugar mix as it continues to beat.  Stir vanilla into milk, and fold in with dry ingredients alternating between wet and dry.  Pour batter over strawberries and bake 50-60 min until a toothpick inserted in the centre comes out clean.  Cool in pan 10 minutes before inverting onto heatproof serving plate and serve with whipped cream.

Individual Avocado Key Lime Pies

Super cute healthy pie

Wanna look like the love child of a Naturopath and  Martha Stewart?  Try this recipe for individualized avocado key lime pies frozen in mason jars for your next summer BBQ or party – the beauty is they can be made ahead and frozen for 2-3 hours or longer, are healthy and taste great.  AAAANNNNDDD are super cute.

Image result for avocado key lime pie mason jars

I mean look at them – look how cute they are!

What you need

so the ingredients and such that you need for the avocado key lime pie:

4 ripe avocados

1/2 cup lime juice (real stuff is best)

2/3 cup honey

1/2 cup graham cracker crumbs

1 Tbsp coconut oil melted

125 ml mason jars or a 9 inch pie pain

freezer space

food processor

Directions

So these super cute avocado key lime pies are super easy.  Here is the how:  Put avocados in food processor with lime juice and honey and process until creamy.  Mix crumbs and oil and press 1-2 tsp into each mason jar or all into a 9 inch pie pan.  Pour green stuff mixture from processor over crust, cover and freeze 2-3 hours. Serve frozen with coconut whipped cream (recipe for that below)

Quick recipe for coconut whipped cream

To top these cute little avocado key lime pies try this whipped cream made from coconut milk!

1 can full fat coconut milk

1-2 tsp sugar or sweetener (agave)

1 tsp vanilla


Refrigerate coconut milk in can for 24 hrs or more and freeze beaters 15 minutes before use.  Open bottom of can and pour out liquid and scoop cream into mixing bowl adding sugar and vanilla then beat and refrigerate till use.


Babies and Chiropractic

Ever thought of taking your baby to a chiropractor?

Babies and Chiropractic  – Did the thought ever occur to you?

I am always treating several babies at my office –  most of the time Moms bring in their babies because they have noticed something that is either odd or that they may interpret as pain in the baby’s behaviour.

Generally they have already consulted the pediatrician and found out that nothing serious is going on.  Usually the pediatrician reassures the parent that ‘it’s nothing’ or ‘they will grow out of it’.

More and more us Moms are trusting our guts… and this advice, while reassuring, isn’t always fully satisfying.  So Mom goes in search of answers and hence we have Babies and Chiropractic stories to share!

A word on a baby chiro examination

As with any patient, a full history is taken – in my office this means an extensive (maybe too long) 4 page intake questionnaire.  I sit with Mom or Dad and ask a ton of questions about the baby, behaviour, breast feeding, health, pregnancy and  birth etc…

I then do a through exam (including but not limited to:  a physical observation, infant reflexes, palpation of the spine and musculature.  I will also often listen to the lungs and heart as well – if there is a specific problem that the baby is coming in about there is also a focused exam regarding that.

Here are some cute pics and instructions on how to check some infant reflexes – now don’t panic if they are not on your baby, chances are that the pediatrician has checked them so far and if they haven’t flagged anything for you the baby is fine.  Got it?  Also, never Google stuff.  Bad for the mental health.  Also don’t do #7 if you haven’t been trained – too easy to drop baby!

A word on chiro adjustments for baby

Ever been to a chiro and had an adjustment?  If so you may not be able to imagine Babies and Chiropractic – I mean really Karen, I am not letting you do that to my baby how could they stand the force?

So the youngest baby I have adjusted was a few days old…. It’s not the same force as we use on adults – don’t be cray cray!

We use what we call eyeball pressure – that is exactly as it sounds: close your eyelid and put your index finger on your lid and push gently down on your eye – just a comfortable amount.  That is eyeball pressure and that is what we use on babies.

I mean really, the poor teeny things don’t even have ossified spinal segments yet we gotta be gentle!

The amazing thing is that babies respond really really fast.  I had a baby in the office for a check up and she happened to have a buch of sinus congestion so I did a few sinus trigger points and within about 10 minutes here nose was running like a faucet. Her mom said that previously all the junk just stay stuck up there and made it hard for her to breathe.

I love treating babies for that reason (and because I always steal a cuddle and hug because who can resist really!  Yes, its always with permission)


Babies and Chiropractic – some of the whys

Here is why some parents bring in their babies in general:

-well baby check (just for a check up)

-torticollis (head tilted to one side)

-colic – sometimes I really think this is baby back pain / digestion issues

-behaviours like putting something under their back at rest time – can indicate pain

-pulling on the ears or rubbing a body part

-chronic congestion (sometimes mechanical things we can do can help drainage happen)

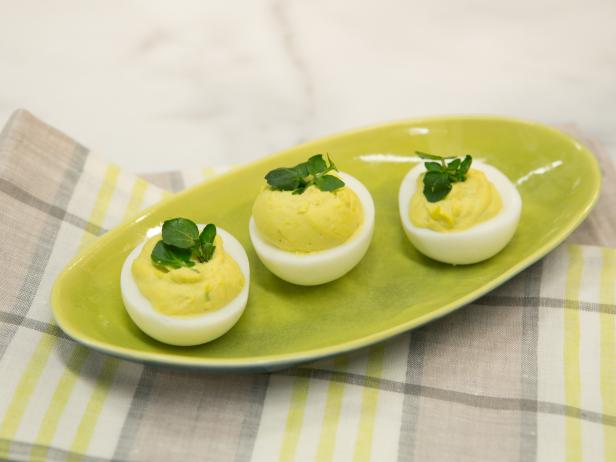
Avocado Deviled Eggs

Good Fats and Protein

Avocado Deviled Eggs:  Ok, so here is a recipe full of good fat and protein.  Perfect for me this week as I am full on into keto diet again – eating tons of veggies, protein, fruit and good fat…   This diet is pretty sustainable and healthy if done properly – the trick is that you have to do some prep work AND have tasty things to eat – and who doesn’t like avocado and deviled eggs?  Hence – Avocado Deviled Eggs!

Ingredients

3 eggs

1 avocado

1 tsp cilantro

3 tsp lime juice

1 tsp red onion chopped fine

pinch salt and pepper

chili or paprika to taste

Directions

ok for the yummy Avocado Deviled Eggs – it is pretty simple:

Cut the hard boiled eggs in half and take out yolk.  Mash the yolks and 1 avocado together and add 1 tsp finely chopped cilantro, lime juice, onion and salt and pepper.  Whip together – you can even use a hand blender on whip to get it nice and smooth – then place by the spoonful into the 6 egg halves.  Sprinkle with chili or paprika.

Image result for avocado deviled eggs

That’s it – simple yet tasty as always!

4 healthy ice cream recipes – that don’t need an ice cream maker

It’s Ice Cream Season!

I love ice cream.  Who doesn’t?

So for the last 5 years I have thought about buying an ice cream maker… ever since I saw one at Costco for about $40 and didn’t buy it.  You know what happens when you don’t buy something at Costco right?  Ya, it’s never there when you go back for it.

So every year this time I think about buying an ice cream maker.  I hem and Haw and don’t end up buying one… I have really no idea why other than I really don’t have space for another kitchen gadget…. and so I keep stalling.

So in this edition, I will post some healthy recpies I have collected to make ice cream, without the use of a fancy gadget (other than maybe a blender and freezer)

Strawberry Banana Ice Cream

4 frozen bananas

1 cup frozen strawberries

2 tablespoons sugar (or stevia powder)


Place strawberries in a microwave safe bowl and sprinkle with sugar.  Microwave until strawberries soften a bit and sugar dissolves in juices.

Place in blender with bananas – blend 2-3 minutes until smooth

That’s it – you can also freeze this and then just take out 10 minutes prior to serving to allow to melt a bit.


Pumpkin Pie Ice Cream

4 frozen bananas

1 cup pumpkin puree

1/3 cup maple syrup

1 1/2 tsp pumpkin spice


Blend all and serve – freezes well as well!


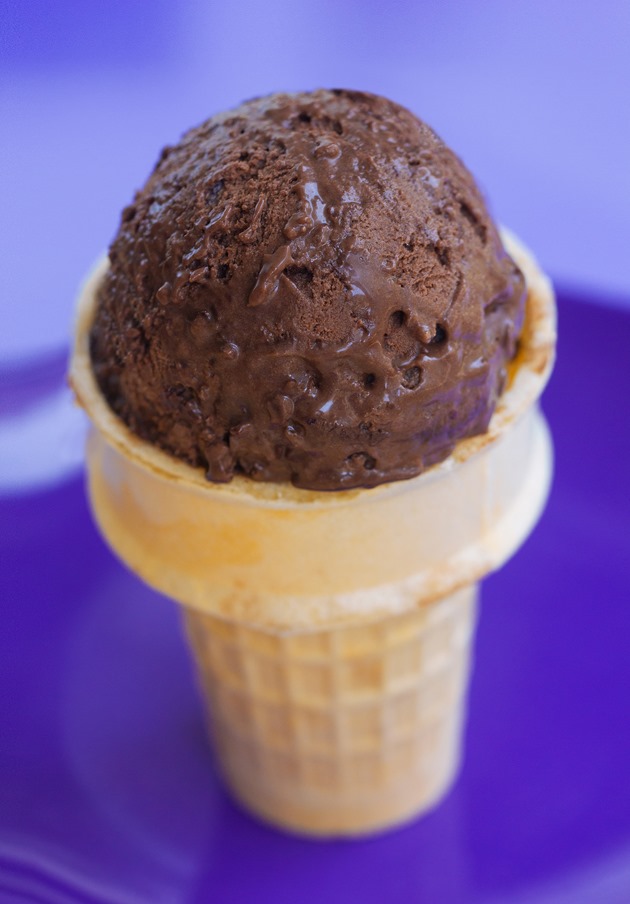
Chocolate Ice Cream

Image result for healthy chocolate ice cream vegan

4 bananas sliced and frozen

6 tablespoons cocoa powder

5 tablespoons maple syrup

4 tablespoons chocolate chips (or leave out for paleo)

Place all except chocolate chips in blender or food processor and blend until smooth and creamy then stir in choc chips… that’s it – serve.  Also will freeze well just take out 10 min prior to serving to scoop easily

Watermelon Mint Ice Cream

Image result for watermelon mint ice cream

1 cup coconut cream

5 cups frozen watermelon cubes

a handful of fresh mint

2 tablespoons of maple syrup

pinch salt


Put all into blender and blend till creamy – then serve.  that’s it!  Can also be frozen and taken out to thaw a bit so you can scoop it.