Olive Tampenade and Kidney Bean Dip

This week in quarantine cuisine… I seem to be scouring my fridge and cupboards trying to use up old stuff I never tend to eat. This time I came up with dried kidney beans and olives. I have a lot of olives in the fridge for some reason and no one in the house except me eats them. With these seemingly random items I decided to make dip/spread – No, not with them both in the same one – two different spreads – Olive tampenade and Kidney bean dip. They were both super yummy and I have been eating them on (stale) pita that I toast (and had in the freezer for some reason. Don’t worry, the pita is actually good when it is toasted!

What you do need for both of these is a food processor or really good blender.

Olive Tampenade ingredients and directions

around a cup of olives (pitted) green or black or mixed

one clove of garlic

around 3-4 tablespoons of Olive oil

salt to taste

Parlsey (I used dried) about a tablespoon – but cilantro would work too

If you have some – capers (I didn’t have these) if you do add them omit other salt

All you do is throw it all into the food processor and process until smooth- ish. It is super yummy on toasted (stale) pita (and would work on non stale items too).

Kidney Bean Dip Ingredients and Directions

1 can kidney beans drained (I had dried so had soaked overnight and boiled for ages until soft… let cool)

olive oil – 1.5 tsp

1 clove garlic (or two if you live alone – I mean who are you going to go see right now anyways?)

around a tsp ground cumin (if you like it – you can omit this too if you like)

lime juice or lemon juice (around 1 tbsp)

salt to taste

1-2 tsp water depending on desired thickness

Same directions as the Olive tampenade above – through it all in a food processor and blend until smooth – serve on toast or pita (stale toasted pita is my go to)

Kidney bean dip
it actually tastes better than it looks in this picture!

So that is my edition of this week’s quarantine cuisine – clean out your cupboards and fridge and give olive tampenade and kidney bean dip a try!

(I actually made both of these twice before I ran out of ingredients… )

Easy Mexican Casserole

This recipe was born out of quarantine … again – hey we gotta try to laugh right? I was really trying to figure out what to do with a couple of stale pitas – and I came up with this recipe made of stuff that was in the freezer/fridge. It turned out so well that I think it may make it into the regular rotation. And I totally made it up! I was kinda shocked… ok so here is my quarantine Mexican Casserole recipe!

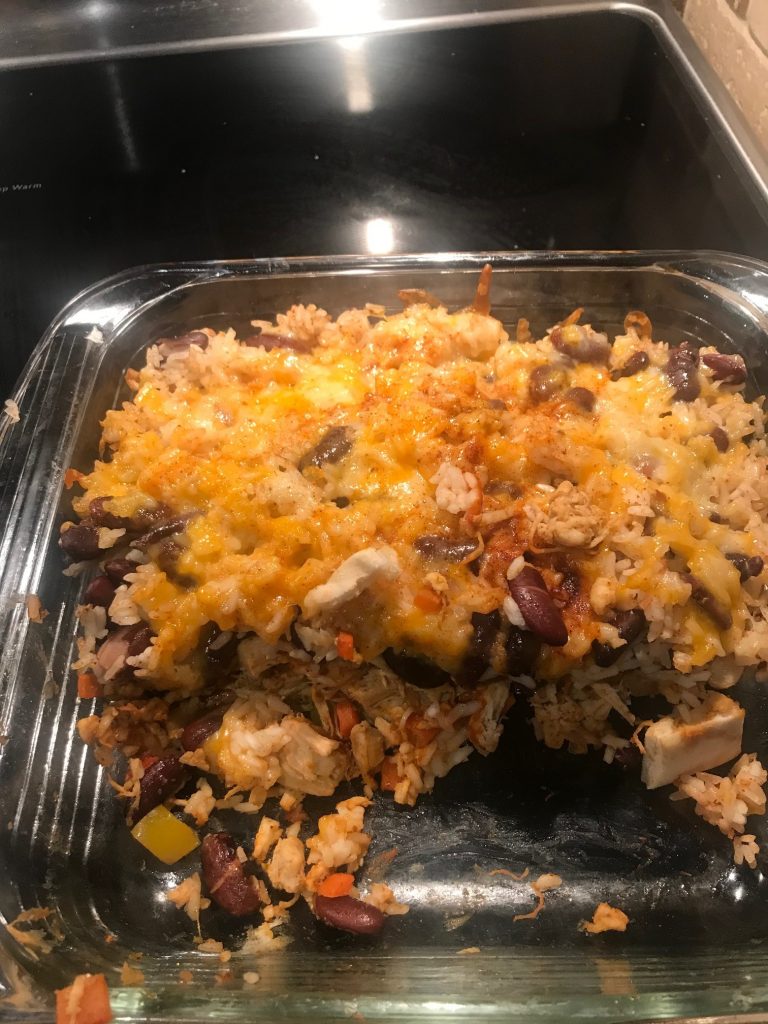
Finished Mexican Casserole
Finished (and half eaten) product!

Ingredients for Mexican Casserole

Stale Pita (one – cut up in 1 cm x 1 cm squares – I used scissors)

2 chicken breasts

fajita or southwest spice (or use a combo of chili powder and paprika)

2 cups of rice cooked

kidney beans (around a can – I used dried but this means you have to soak them overnight and boil them before you get the recipe started- I happened to have some at home so that is what I used)

red pepper (about 1/2 cut up into small pieces)

a large carrot – also cut up very small

garlic – 1-2 cloves

grated cheese to top the casserole – around a cup

salsa to taste

Remember I totally made this one up flying by the seat of my pants so the amounts are kind of fluid and guess work

Directions

To make the Mexican Casserole you need to work on layers. Grease an 8×8 inch glass pyrex dish and preheat the oven to 350 F. Cook rice. Cut the pita into 1cm x 1cm cubes and put them evenly in the bottom of the pyrex roasting dish and set aside. Mix rice and beans and add some garlic to the mix as well as paprika or southwest seasoning and set aside. Place cut carrots in pan with a bit of oil and fry until semi soft then remove from pan. Add chicken breast that has been cut into chunks and cook (I had to thaw mine in the microwave and I ended up half cutting and half shredding the chicken which gave it a nice texture. Season with southwest seasoning and at the end of cooking add in the veggies to cook slightly. Transfer on top of the pita layer into the pyrex dish and top with salsa to taste. Then top the salsa layer with a layer of rice and beans. Top with shredded cheese and bake about 20 minutes to heath through and melt cheese. And that’s it my made up quarantine Mexican casserole! I had some leftover ingredients and made it twice it was so good!

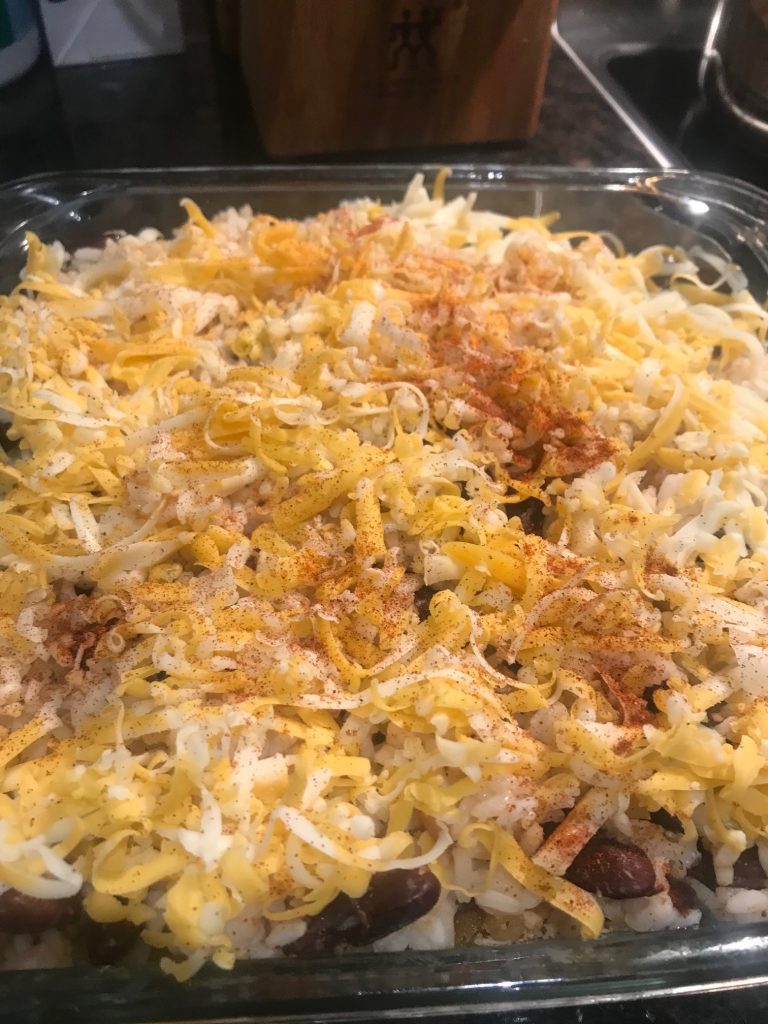
Mexican Casserole prior to baking
Prior to baking … so yummy Mexican Casserole

Stay safe, stay home and see you soon!

Let me know if you try it!

Venison Burritos and Flat Bread

So…. crazy month right? So here we are most of us at home and I, for the first time, have had to close the clinic indefinitely. Scary times but we have to remember to count our blessing (though sometimes that is hard to remember). I am the first to talk about my past history with anxiety and depression and this situation is not helping. It is important to talk about. Reach out for help if you need it. I am here. We will get through this and come out stronger. This week I find myself cooking the weird things in my fridge and making darn sure I don’t through anything out. And so begins the first of our Coronavirus (COVID-19) recipes. While you may not have all the ingredients for this one laying around… you can make a ton of substitutions… and I found a great flat bread recipe that requires only a few ingredients and was so delicious it is worth a shot… we may as well come out of this really good cooks right? So – Venison Burritos and Flat Bread

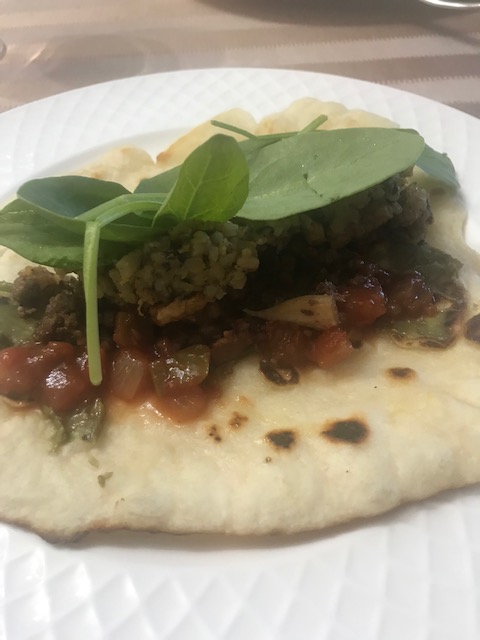
Completed Venison Burritos

Ingredients for Venison burritos filling

Ground venison (or any ground meat)

bacon (3 slices – because the venison is very lean and needs some fat)

I even threw in 3 chicken wings chopped up so I wouldnt waste them

sauce (I used leftover sauce I wouldn’t have otherwise used from a shrimp ring!) but any tomato sauce would work

Ingredients for Flat bread (makes 3-4)

1 cup flour

3/4 cup water

1/2 tablespoon of baking power

1 tsp oil

salt – 1/2 tsp (oops I think I forgot this – didn’t matter!)

the original recipe called for canola but I used olive and the original recipe called for more canola to pan fry the flat bread- honestly cooking spray is better otherwise these would be greasy…

Instructions

First lets talk flat bread – so the original recipe was floating around on Facebook for Navajo Flatbread I don’t wish to steal credit so please go and look at it – I did change it a bit for my purposes which is what is reflected above. All you do is mix the ingredients together and knead a bit…. leave to rise for 30-60 minutes and roll out very thin and fry in a very hot pan (they said cast iron skillet if you have it) flipping once – these were so easy and delicious it made the meal gourmet.

For the burrito filling I cut up three piece of bacon and fried it then added the venison and chicken wings. Cook until mostly done then added the shrimp sauce (or other red sauce) and some salt. That was it. I served the burrito filling on the flat bread with some avocado and grated cheese and salsa – with some spinach on top. Seriously Quarantine Gourmet (credit to that phrase to my friend Dr. Emily Howell).

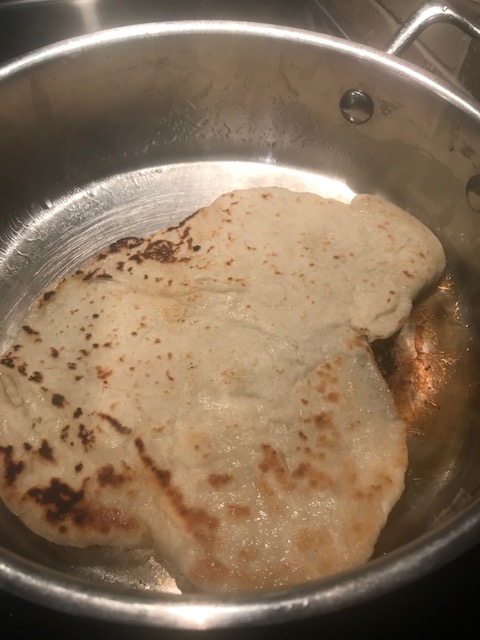
Frying up the flat bread for Venison Burritos

Sweet Potato Quinoa Salad

We got a small preview into spring this week …. and then mother nature slammed us with a winter storm to remind us it is NOT spring. Nope! It’s still February. It’s ok, we know its coming now! How about trying to hold the feeling with a lovely spring like colourful and zesty sweet potato quinoa salad? This recipe was given to me and invented by a patient of mine. Thank you Miriam !

I haven’t tried this one myself (so no pictures yet) but I plan to this week or weekend and will add pictures when I do!

Image preview

Ingredients

Here are the ingredients for the sweet potato quinoa salad

cooked quinoa (about a cup)

chick peas (around half a can rinsed)

one sweet potato cut into chunks

cherry tomatoes (halved)

yellow or red pepper cut into chunks

For the dressing:

Combine a couple tablespoons of olive oil, the juice of a lemon, garlic powder, onion powder, paprika, cayene pepper, chili powder, dried parsley and salt and pepper

This gives the salad a nice zip!

Directions

Simply combine all ingredients for the salad and toss. Mix the salad dressing separately and pour over top and toss all ingredients. Sweet potato quinoa salad will keep for a couple days in the fridge and actually tastes better in a day or two as the dressing gets absorbed. Hope you love it!

Left over chickpeas?

So now that you made this sweet potato quinoa salad you now have a half a can of left over chick peas…. what to do with it?

Here are some ideas – try making this Humus recipe from a friend’s blog OR

This is what I am trying this time: the same amazing patient Miriam told me to toss the left over chickpeas with salt and place on a parchment lined baking sheet – put into a preheated oven at 275F for about 20 mins till crispy and eat them as a crunchy and yummy snack! Toasted Chick peas- yes please!

Image preview

Red Beans and Rice from Jamaica with Love(Peas and Rice)

Image preview
Peas and Rice (red beans and rice)

I just got back from a trip with a friend to Jamaica – the lovely Runaway Bay. It was amazing. Of course one one my goals was to eat Jerk Chicken and Red Beans and Rice (they call this peas and rice and I am sure they are right but for some odd reason I have always called this dish red beans and rice). Well, let me tell you -goal acheived!

Another goal was to get an authentic recipe for red beans and rice (aka peas and rice). So I asked a local – who promptly pulled in one of her co-workers telling me she is an awesome cook. She recounted the way she makes it and I am going to tell you… so lucky.

I will give this authentic recipe for red beans and rice a try next week. Of course the proportions are all made up by me so it may need some tweaking… She gave me the recipe but obviously does all by feel/sight/memory just like all good cooks and grandmothers everyweher

Ingredients

Red kidney beans (dried) – around 1 cup

water

coconut milk (1-2 cans)

scotch bonnet pepper (one whole fresh one)

long grain white rice – 1 cup

brown sugar 1-2 tablespoons

Thyme (I have no idea how much – go by feel on this one 1 teaspoon? 1 tablespoon? your guess is as good as mine)

Scallions – 1 or two skinned and smushed but not chopped

So, by her telling, the key ingredients are coconut milk and brown sugar. I have seen some other recipes with garlic but the one I got while actually standing IN Jamaica did not have garlic mentioned… it may be worth trying both ways to see which you prefer.

Directions for Red Beans and Rice

So I have seen recipes that say soak the beans overnight in water then boil… my lovely Chef told me just to boil the dry beans and keep adding water and boiling until they are soft and you can smash them with a fork.

Then drain the water and add all other ingredients and just enough coconut milk to cover rice without it coming through the surface.

Image preview
what the recipe looked like at this stage

Boil like you would with rice and that is it. Take out the whole hot pepper and scallions, mix and serve. I served this one with Jerk Chicken – I used the Memories of Montego Bay PC premade sauce – it is spicy! so be careful only use a bit at a time till you know what you like – this time I used a whole bottle on 6 whole chicken legs (skin on) and it was a bit too burning for my hubby (I liked it though!) cut it with sour cream if you need to put out the fire!

Image preview
Easy and delicious – even better on legs and BBQ in the summer
Image preview
This time I just baked it but it was a bit hot… go with less sauce and brush on and have some on the side if needed.

All I did was dump the sauce on the chicken and bake at 375 F for 45 mins to an hour… so easy. If you want to try to make your own Jerk Chicken check out these recipes:

Jamaican Jerk Chicken

Jerk Chicken

https://www.foodandwine.com/recipes/jamaican-jerk-chicken

Korean BBQ Chicken Thighs that are Paleo and Healthy!

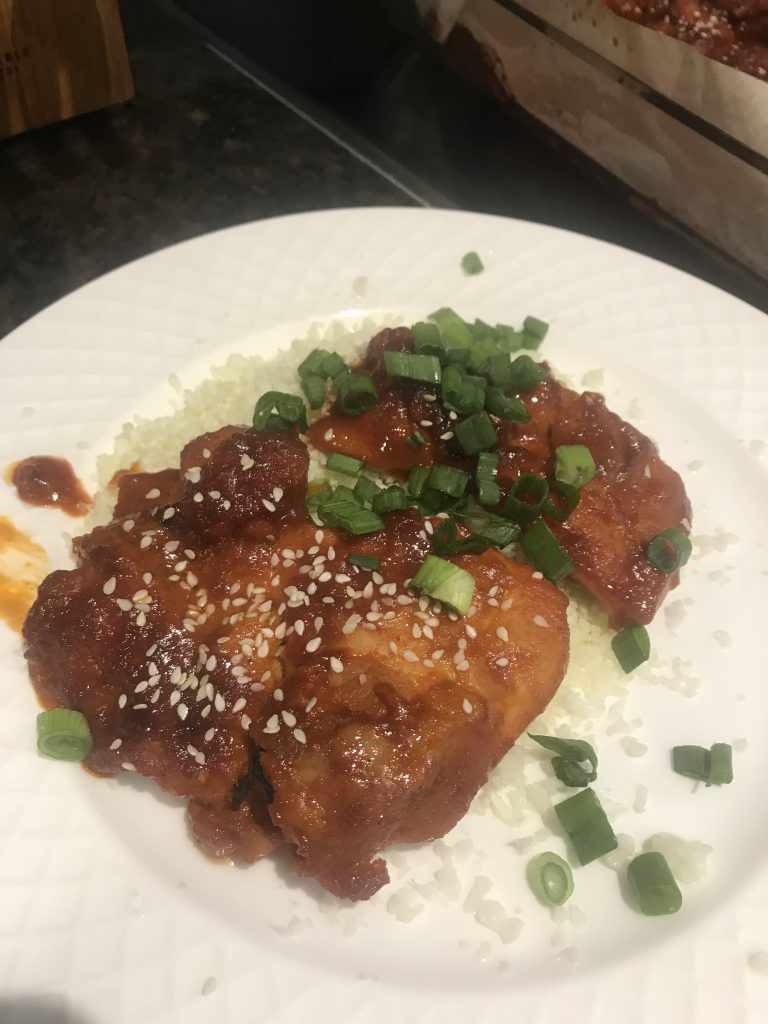
So this is a recipe I have had in my repertoire for quite some time…. It came originally from a friend who got it from another website at some point. I have modified it to my tastes and made it even simpler than it was – it was super simple to begin with. It is easy, tasty, healthy and fast. All the greats of a weeknight recipe – try out this awesome one for Korean BBQ chicken thighs.

Korean BBQ Chicken thighs with Cauliflower rice

Ingredients for Korean BBQ chicken

Here are the things you need to make this yummy Korean BBQ chicken thighs recipe … yes of course we start with the chicken thighs…

Chicken thighs – boneless skinless – 6

Garlic – 1 or 2 cloves finely minced

Honey – 2 to 3 Tablespoons

Gochujang paste (Korean chili paste- see below) 2-3 Tablespoons (match honey addition)

Ginger – 1 teaspoon

Sesame oil – 1 teaspoon

Sesame seeds – about a tablespoon

Green onions (1 chopped)

Kosher or Sea salt – about 1/4 teaspoon or to taste

The only thing that is at all difficult here is the Gochujang  chili paste – this I actually find at a large grocery store with a big international or Asian section or at an Asian grocery store…. see picture below. The Gochujang paste is the key ingredient in this Korean BBQ chicken thighs recipe so it is a must and I don’t think that there is a substitute. This one pictured I found in my fridge and it prompted me to make this recipe again before the Best Before date.

Directions

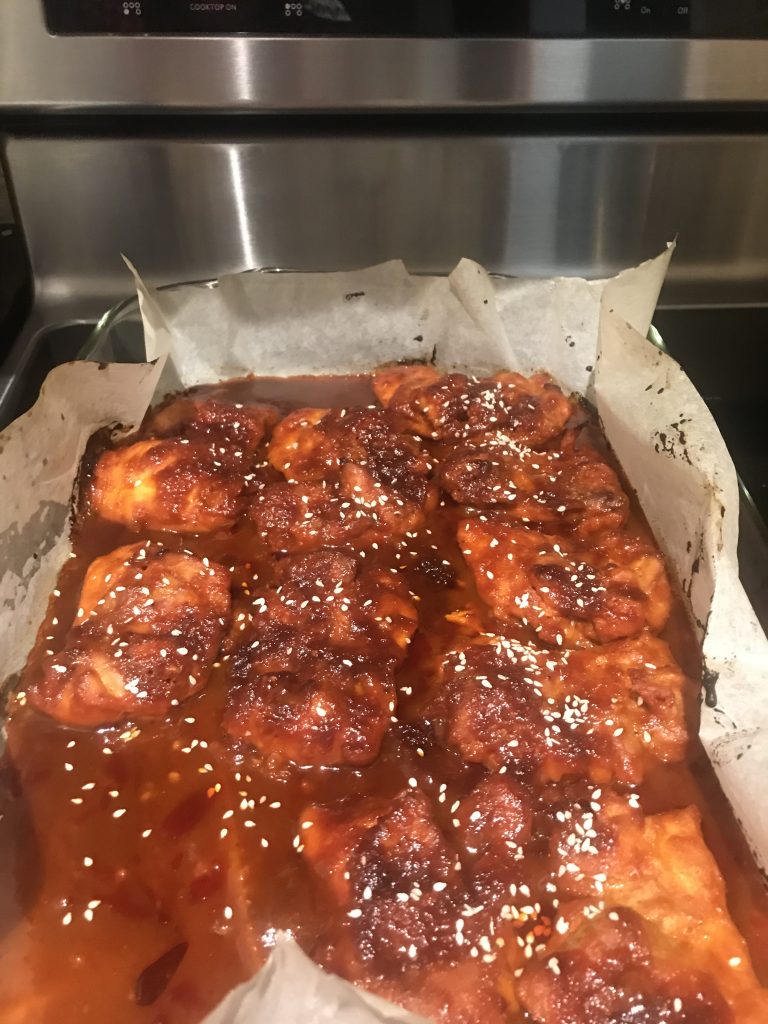
Line a baking dish with parchment – first I spray the bottom with non-stick spray or coat with a bit of oil using a paper towel or brush. Preheat oven to 425 F.

Lining the pan with parchment makes cleanup super easy for Korean BBQ chicken

Mix chili paste, honey, oil, ginger, garlic and salt and add to chicken thighs – I do this in a plastic bag and let it sit overnight if I have time. If not I mix all of this then pour it over the thighs in the dish making sure it is all coated. Let’s be honest, I don’t always have the foresight to marinate the chicken. So if you do marinate then just toss the contents of your bag into the lined baking dish when ready – try to spread out the thighs so they lay flat and are in one layer.

Bake for 25-30 minutes – then broil if you wish (they will be cooked before broiling) for 10 minutes – I often skip this step and bake only but add a few minutes. That is it – you have Korean BBQ Chicken thighs at the ready – garnish with chopped green onion and toasted sesame seeds and serve with rice or calulifower rice.

To make cauliflower rice check out this recipe from a prior post for Slow Cooker Coconut Curried Chicken and Cauliflower Rice and scroll to the bottom… Hey, I forgot about this one – it is good too!

This recipe is sweet and savory and a bit smokey – so so good.

Omelette Bites by Sarah the Intern!

Before I get down to this recipe for Omelette Bites I have a tiny bit of background… I promise not long because I hate those posts where you have to scroll through 7 pages of text to get to the recipe – I just want to give credit for this one where credit is due…

So you may know that we hired a 3rd year chiropractic student as an intern to help with the front desk on our busiest evenings (Tuesday and Thursday) – her name is Sarah and she is great 馃檪 She is currently learning our computer system, helping with filing and pulling files, taking payments and answering the phone all while building rapport with our patients. She will also be helping with marketing soon and has done a great job of making some semblance of sense of a notebook I keep to track some of the places I call to do lunch and learns – totally old school of me right? Ya, she’s got it on excel now… it was a big job.

Last week I asked her to give me a recipe for the blog – she came up with this one for Omelette bites – and even took pictures and sent them to me – I have made something like this before but I can’t wait to try this recipe! Since we love recipes so much around here I can’t wait to see what others she has too!

Thanks Sarah!

Omelette Bites by Sarah!

Omelette bites ingredients and directions

5 large eggs

1 tbsp milk (optional)

陆 cup chopped spinach

陆 cup chopped red pepper

陆 cup chopped ham

Optional: 陆 cup shredded cheese (I use mozzarella)

路 Preheat the oven to 375 and grease a muffin tray (I used an oil spray)

路 Add the eggs and milk into a bowl and whisk together

路 Add the spinach, peppers, and ham to the eggs and mix together

路 Fill each cup with 2-3 large spoonfuls and add the shredded cheese to the tops

路 Bake for 15-17 minutes

路 Add salt and pepper for taste if preferred and ENJOY!

This recipe makes 11-12 bites

~110kcal per bite

So, why pay $5 at Starbucks for two of these when you can do them so easily at home? Let me know how they work out for you!

To Die For Instant Pot Veggie Risotto

Image preview

Risotto, such a yummy comfort food… somehow I always thought it would be hard to make and just leave it to order in a restaurant. Well, a patient of mine proved me so wrong on that one. So pretty much by now all of my patients know I love recipes… and after I ask how the are doing and talk about their health, sometimes we start talking about food and recipes (especially around dinner time). One of my patients in particular is naturally a fantastic chef – this makes me super jealous since she is only in her early 20s and somehow she just knows how to make amazing food. It’s a gift.

Last time she was in the clinic she mentioned this amazing risotto for the instant pot and told me it was so good she and her family don’t bother ordering it when out at a restaurant anymore since they just always get disappointed – I totally get it because that is how I feel about creme brule (my recipe is way better – I swear – just click the link).

That was on a Thursday or Friday. Naturally all I could think about for the rest of the weekend was the risotto. I have know this family at least 15 years…. I decided to harass her mom into giving me the recipe – which she gladly did AND said I could post! Lucky us! Thank you Taylor and Jane. You guys are rock stars.

Ingredients

Here is what you need for the risotto

Frozen butternut squash (cubed) – 3 cups

unsalted butter – 2 Tbsp

garlic – 3 cloves minced

yellow onion minced – 1

thyme – 3-4 sprigs of fresh or 1 tsp dried

salt 1 tsp

2 portobello mushrooms diced

baby spinach – half a large container

Arboro rice – 2 cups

white wine (dry) – 3/4 cup

white miso paste – 2 Tbsp

Soy sauce – 2 tsp

veggie or chicken broth – 900 ml

Parmesan – 1/2 cup grated or to taste

Directions for Risotto

Thaw butternut squash to room temperature in the microwave. In the instant pot on saute on medium or normal setting melt the butter and add squash, onion, garlic, thyme, salt, pepper and mushrooms. Saute 2 mins then add spinach and cook down for about 5 minutes but don’t worry if all spinach has not cooked down.

Add rice ans stir until lightly toasted (edges translucent) – around 1 minute. Stir in miso and soy sauce and then wine and stir until alcohol has cooked off – around 2 mins. Press Cancel button and scrape down rice off of sides and add broth. Seal instant pot and switch valve to “sealing” mode and cook on low pressure for 7 minutes. Then when time up let pressure release naturally. When valve is down and it is safe to remove the pot’s lid remove it and stir to let rice absorb any remaining liquid. Stir in Parmesan and transfer to serving plates or dishes. This serves 6-8 people and will keep in the fridge for 5 days.

This literally took so little time – maybe 20 minutes – and I served it to friends coming over for dinner. It was a crowd pleaser and was super easy – so much so that I did it on the fly – the hardest part about it was chopping the onions and mushrooms.

Roasted Pumpkin Seeds a New Way

This was a tip from a patient – less a recipe, more an idea…. If you still have pumpkin seeds to roast leftover from Halloween here is a great way to do it! Try this new twist on roasted pumpkin seeds.

buttered roasted pumpkin seeds

Ingredients for roasted pumpkin seeds

Raw pumpkin seeds

Butter (unsalted or salted)

Salt (if using unsalted butter)

Directions

Preheat oven to 350 F . Melt butter – I used about 1/8th of a cup – stir in raw pumpkin seeds to coat and spread on a foil lined baking sheet. I used unsalted butter so i sprinkled the top with salt and then baked – around 15 minutes until golden,

This was a new twist for me on pumpkin seeds which was so super tasty I couldn’t believe it. In fact they were cooling on my stove when a friend came over and started eating them and then asked me what the heck I did to them to make them taste so good… so thank you patient (you know who you are) who mentioned this one to me this week. You made my pumpkin seeds extra good this year. This one is also super keto friendly if you care about that. Also makes the pumpkin seeds extra dangerous since it is super hard to stop eating them.

Give it a shot or save the idea till next year – but let me know if you try it – I ended up storing the leftovers in the fridge but I am sure they would be fine on the counter too – I do keep some butter on the counter in a dish so I’m sure that it would be the same – it’s not like they willlast long….

Pulled Pork and Caramelized Onions

I have been wanting to put this recipe up here since the summer. My mother in law (Ruthie) made this (twice apparently but only once when I was around) and it was so good that i nabbed the recipe with the intention of listing it on the blog… I wanted to wait until I made it to actually put it up here – and yesterday – I did! So here it is – slow cooked pulled pork and caramelized Onions!

What you will need for the pulled pork

Pork shoulder roast

1.5 tsp smoked paprika

2 tsp black pepper (I omitted this – my son Leo doesn’t love spice)

1 tsp Cayenne pepper (I used chipotle this time)

dried thyme 1 tsp

garlic powder – 1 tsp

Directions?

Literally just mix all the dry ingredients together and rub all over the roast. Place roast on rack in slow cooker and place one cup of water in the bottom of the cooker being careful not to wash of the rub from the roast. Cook on low for 8 hours.

Remove from heat and allow to cool enough so you can handle it – here is the messy part – separate the fat and sinew and discard as well as discarding the fat and water at the bottom of the cooker. Place the meat in a bowl and pull apart with two forks until desired consistency is reached – add your favourite BBQ sauce or none at all – it is so yummy!

yummy slow cooked pulled pork

Ok but what to do with pulled pork

Sandwiches for my husband Ryan for sure and for me a pulled pork salad bowl (so good I had it today for lunch I will post that one next week – it is super simple to make with the leftovers or just intentionally with this pulled pork.

For Ryan He loves a crusty bun with pulled pork, caramelized onions, pickles, cheese and hot peppers – so good and messy… Also this meal goes a really long way – I bought two pork shoulder roasts from Costco for $26 which I thought was really good but one of my patients said you could get it at an even better price. One roast will feed us for several meals this week for sure.

Caramelized onions – a great topper for pulled pork

So this is super easy but does take a while – and frankly I smell like onions all day… sorry to my patients today!

I used a whole bag of regular cooking yellow onions (but lots of people use sweet ones)

around 3 tablespoons unsalted butter

1 tablespoon of olive oil

1-2 tsp of brown sugar

around a teaspoon of salt.

So here I just melted the butter and added oil then the onions (peeled and sliced really thin – I used a food processor for this step), brown sugar and salt. Cook stirring very often on medium to low heat – this part takes ages to brown up slowly and release the natural sugars in the onion – around an hour. Yep and hour. Ya my house and me kinda stink – even after I showered. I like to diffuse the essential oil Purification in the house (by Young Living) to help with the smell. So delicious and actually worth the hour. But I do a ton at once in a big pot and then refrigerate – I am going to try freezing some this time to see how it works…

Half way through the process - caramelized onions

So there you have it – super simple and so tasty…. let me know if you try it!