Core stability week 1 – Brace

Over the next 5 weeks I will be posting one exercise per week via video to show you how to build a strong back and core stability.

I only like teaching one exercise at a time because that way you are much more likely to incorporate that exercise into your daily routine, get good at it, and be ready to add another one in a week.

So we will start with the Brace which I think I have blogged about before but you need to do this exercise and be good at it to do the following 4 weeks of exercises.

Please click on the underlined words “Brace2”  below to watch a quick video of how to do this.  I made this video for a lifting post I did but the exercise is the same (yes by the way you should do this when you lift too!)

Brace2

Try doing this every time you stop in your car at a red light or stop sign and hold it as long as you can.  Remember you should be able to breathe normally during this exercise or you are doing it wrong.  Just engage your abdominal muscles and hold.   It helps build strength in your abdominals and even some deep layers of the lower back muscles.

That’s it for now  – call, email or text me If you have any questions!

Happy bracing!

Asking for Help when you need it is healthy

We go about life independent and strong and doing things for ourselves or on our own because we are supposed to be able to handle life.  But when life happens – and life is messy as we all know – we need to be able to ask for help and more importantly let people help us.

Here is what is going on with me.  Busy life as usual, practice, patients, home, husband, small child… and now a very sick parent.

My dad is in hospital for the past 10 days with a subdural hematoma.  A bleed between his skull and brain as a result of being on blood thinners and falling.  He alternates between semi coherent and conscious and unconscious, or confused.  He was better a week ago but I am told it goes like this. Up and down on the roller coaster of life we go.  So he will be in hospital for a while and then likely (hopefully) rehab and then who knows.  One day at a time. One day at a time.

Duirng this period I am trying to go to the hospital for a few hours per day and work and continue to do all the things I need to do to build my practice. But there are things I can’t do or don’t have energy for.  One of those things is my blog – I skipped the recipe this week (sorry).  But an amazing chiro woman warrior friend of mine came up with a solution. Ask for help.

I did this yesterday on facebook – I put it out there what had happened and I asked for help.  I said ‘I don’t know what I need but I need help. Please reach out.”  My friends immediately started calling, I got offers of babysitting and the casserole patrol has been activated (thank goodness).

I also got something I was surprised by – praise.  People telling me how strong I am and how proud they are of me for asking for help.  Lets not pull punches here, I am fiercely independent and generally want to do things on my own but I have learned recently the value of asking for help. Human beings are social creatures, we need our social networks for survival.  People genuinely want to help but first they need to know you need their help.  I read a study recently, or maybe actually it was a Ted talk, saying that the best predictor for longevity and health into old age was food social networks.

So, moral of the story – ask for help. People want to help you. It will be your turn to help some other time.  And round and round it goes.

In the coming weeks I will have guest bloggers and recipes from friends on my blog – some will be chiro friends but if you want to participate and send me something  to post please do at karenchiro@hotmail.com

All contributors will receive credit and if you have a website a link will be on my blog as well to your site. Google likes things like that anyways 🙂

And thank you, for all of your help and your readership. xoxo

Painful conditions in Pregnant and New Moms

Painful conditions in pregnant and new moms

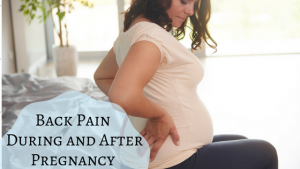
Some of the things they don’t tell you when you are trying to get pregnant: babies can poop all the way up their back and get their necks dirty (aka: a pooplosion), hormone changes after birth can give you night sweats that soak your pyjamas and sheets, and pregnancy can cause all sorts of fun painful conditions – some of which may not disappear after birth. Oh ya, and even if they do, carrying baby, baby stuff, car seats and breast feeding can cause all sorts of other painful conditions.

Fab right?

I mean all you wanted to do was have this picture perfect pregnancy and teeny adorable little person to marvel at right? Now this pain crap is getting it the way.  Ok, so you go to the family doctor and (most of the time) they tell you to wait it out and it will go away.  But it doesn’t. Or it’s getting in the way of your marvelling time.  I’m writing this to tell you there is hope and lots you can do.  I’ll let you in on a secret – pain isn’t normal. It is your body trying to tell you something is wrong and you need to do something about it.  So in this post I will go over some common painful conditions of pregnancy, give you a couple tips you can do at home to help yourself and outline other things that you can go seek help for.

There is always something you can do. That is tip one. Ok? Lets go…

Lower Back Pain

This can happen during pre and post partum periods and can be for a host of reasons – from sacroiliac joints that are too mobile because of the increased hormone Relaxin in your body during pregnancy, to round ligament pain, and muscle spasms, lower back pain is probably the most common painful complaint during pregnancy and post partum periods. Luckily there is lots you can do but what you do depends on your diagnosis. If you know that your sacroiliac joints are too mobile – this one happened to me during pregnancy to the point I had trouble rolling over in bed and getting up (not a great place to be as a chiropractor treating patients) – one thing you can do is seek out a pregnancy support belt.  This one saved me during pregnancy but don’t rush out and buy one unless you are sure this is your diagnosis.  One thing I try on patients in the office before getting them a belt is belly taping with kinesiotape.  Kinesiotape is that stuff you see on the summer Olympic athletes (think beach volley ball) for injuries – it is a great tool for tons of stuff and can help support pregnant bellies and backs too.  In general, lower back pain of pregnancy is fairly easy to treat but it is important to find a practitioner who has experience and is comfortable treating pregnant mamas.  Personally in my practice I do lots of deep tissue release, muscle work and possibly chiropractic adjustments to sort these problems out in both pre and post partum periods. Lots of research has been done to show that chiropractic care is one of the most effective forms of treatment for lower back pain in general as well as lower back pain in the pre and post natal periods.

Tailbone Pain

This can happen during pregnancy and is likely due to ligament strain on the coccyx (or tailbone) from the extra weight being carried by Mom. Ok, usually family docs say they don’t know why this occurs and it will go away after birth.  Sometimes tailbone pain starts after or during birth – this is likely due to strain on the ligaments attaching the tailbone to the base of the spine from the baby moving or even pushing.  Again the MDs generally say it will go away on its own. Sometimes it does.  But sometimes it doesn’t. I have heard of patients who have had this for years after the birth of the baby and some who even go for cortisone injections in the region years later because they are so desperate to find a solution. Tailbone pain is fairly easy to treat for a manual practitioner who has experience with it – suffice it to say we have to get the ligaments to relax which can be done with some specific release techniques.  They aren’t always the most comfortable during treatment but are really effective.  It really breaks my heart that people live with this one for years without knowing what to do. If you suffer with this one please don’t leave it – the longer you do the longer it will take to treat and get it to go away. Something you can do in the meantime (while dialing the phone and calling to make an appointment with someone to get yourself treated) is to buy a donut shaped pillow (also called an invalid ring or hemorrhoid pillow) – as you can imagine sitting with this condition is not a fun thing.  The donut pillow can relieve some of the pressure with sitting.  I have seen them online for about $25.

Upper back pain during pregnancy or breast feeding

Have you ever had back pain in your upper back sort of to one side right near your shoulder blade? Do you feel like you need to just have someone push on that spot or lean against the corner of a door frame to relieve the pain?  Ya so that is rib pain. Yes you have ribs up there.  The rib cage goes from your collar bone all the way to where you can feel them near your stomach and wrap from front to back.  When you breathe in your ribs are supposed to swing gently up, and when you breathe out they swing gently down a bit – like a bucket handle.  During pregnancy, and even more commonly during breast feeding or even just with carrying the new baby (generally with one hand), the ribs can get stuck and stop doing this. That causes inflammation and angry muscles.  You can even get pain travelling around to the front of your chest or down your arm due to this pain.  Some people end up in the ER because the pain can be so intense that they think they are having a heart attack. This one is super painful but also easy to treat with muscle work and chiropractic adjustments.  I love helping people with this one because I suffer from it myself so I know how it feels and what to do to get it to stop. Again I will advise you to treat it sooner than later because the longer you leave it the harder it is to get the problem solved (but it is still solvable I swear).  A tip, especially if you are having trouble sleeping because of this pain is to do what I call the towel trick.  Take a small hand towel and roll it up like a skinny snake lengthwise.  Place this on the floor or bed and lay on it placing it between your spine and your shoulder blade on the side of pain.  Only lay on it for up to 5 minutes and do not fall asleep on it as it will irritate your back further! This should settle your muscles down a little bit but won’t totally solve the problem.  It should get you sleeping though.


I hope these tips helped – Please do seek treatment if you have a painful condition – like I said it is you body telling you that something is up and needs attention – but not to fear there is always hope!


This text has been posted at TorontoNewMom.com please check out their blog its great!


Keto Tacos

Taco Night Keto-style

It can be hard cooking for your family if they aren’t following the keto diet.  Here is a recipe that the whole family will like and you only have to do one extra small step with the oven and parchment paper for your own meal.  Way  better than cooking two meals right?

For this recipe just prepare tacos like you normally would –

Ingredients

1 lb ground beef

taco seasoning (the old el paso packets are ok for keto I checked)

Taco shells (for the family)

2-4 slices of provolone cheese (for you)

shredded lettuce

diced tomatoes

avocado

hot sauce

salsa

shredded cheese

Here is what you do – prepare the ground beef according to packet directions and have the family top their tacos on their regular taco shells.  For you following the keto diet place two slices of provolone cheese evenly spaced  on parchment paper and place in oven at375 degrees for 9-10 minutes. Take out of oven immediately and flip onto a thick foil bread pan so that the provolone makes an upside down “taco shell” shape and leave in this position until cool and hardened (maybe 30 seconds). You now have your very own keto taco shell that is yummy and crunchy to fill! go easy on the salsa and make sure you read the ingredients unless you are making your own.

Enjoy!

Lower back pain and the dreaded herniated disc

So you slipped/popped/herniated a disc.  Nope nothing sipped or popped really. But this sucker hurts.  Like a lot.

Let’s back up a minute. What the hell is a herniated disc and why does it cause so much back pain?

Ok here is a bit of a small anatomy lesson.  The spine is made up of bony vertebrae and in between them sits a disc that is made of connective tissue with a gel filled middle.  Picture a jelly donut with the donut part actually made up of concentric rings layered like an onion.  Are you with me so far?  Ok, so then really close to these discs are nerves on either side of the spine at each disc level (kind of).  Now that you have that picture in your head I can explain what happens to the discs sometimes when we injure them.

Sometimes with repetitive movement, lots of flexion, sitting, moving, lifting, standing (and just life in general – because these things are cumulative) the jelly in the disc starts to make its way through the concentric rings causing the outer layers of the jelly donut to bulge outwards.  If this bulging is anywhere near the nerve the nerve gets ANGRY. Nerves do not like pressure. Nerves. Do. Not. Like. Pressure.  In fact it only takes 8 mm of pressure to cause the nerve to have altered function and possibly cause pain, numbness or a whole host of other symptoms.  8 mm of pressure is the amount of pressure you feel on the back of your hand if you place a dime on it. So not much pressure on the nerve and you get back pain. This is just mechanical pressure but the nerve can also be irritated by chemical mediators released in the area such as inflammation… ok lets not get too complicated.

Where were we?  Ok, we have a bulging jelly donut and this is causing pain in the nerve.  This could translate into back pain, back pain with leg pain or even numbness and tingling in the leg.  This can get even worse if the jelly makes its way all the way out of the  donut rings and we call this a herniated disc.

Right so what do we do?

Firstly most herniated discs do not like flexion of the lower back or increased intra abdominal pressure.  That means sitting, bending and often coughing and sneezing too.  These things will cause increased symptoms and should be avoided if possible.  Because of the common course of herniation bending forward at the waist actually forces the jelly in the donut backwards causing the bulge or herniation to get worse.

For this reason those with a herniated disc may respond really well to the McKenzie protocol which I prescribe to patients in my clinic.  I am going to upload a video with a simple exercise below but you have to promise me that if you suspect you have a herniated disc to please go check with your health care professional to make sure that this is the thing for you to do. If you do try it on your own and symptoms worsen – STOP.

Ok now that that is out of the way  – the easiest (but not always the correct) McKenzie exercise to show you are simple back bends or extensions.  All I want you to do is stand up and put your hands on your lower back. Then bend backwards keeping your neck in neutral and arching only your back then stand up again.  I want you to do that 5-6 times in a row – all of this should take less than 15-20 seconds.  That is it. If you are doing this right and you do have a herniated disc the pain or numbness in the leg should feel better a little bit better.  If it feels worse please discontinue the exercise!!!

****Important note – if you have bowel or bladder changes such as a loss of control you need to seek emergency care – as in go to the Emergency Room.  Do not pass go, do not collect $200. Ok?

Good.

Right, so if this exercise does make the leg pain or numbness less but increases the lower back pain that is actually ok and expected… If it does some of all of these things you can do this up to once an hour.

You still need treatment and fast so please contact me or another health care provider so that we can help you  – hope this helps!!!

Exercise video listed below (underlined: “McKenzie Exercise” please click it and it will take you to the video)

McKenzie Exercise video click here

Fast and Easy Amazing Toasted Brussel Sprouts (Keto)

Want a really healthy keto friendly side dish?


Seriously easy. Like 5 minute prep time easy.

I never NEVER liked brussel sprouts until my husband’s Aunt Lainey made them for me this way. It is the ONLY way to make Brussel  sprouts in my opinion.  Made too many? No problem.  You can turn the leftovers into a yummy salad the next day. No Down Sides. Really.

This one has 3, count ’em, 3, ingredients:

Brussel Sprouts

Extra virgin Olive Oil

Garlic Powder

Ok so here is what you do – go to the grocery store and buy brussel sprouts – a man in the store once told me to pick the small ones because they taste better.  I have no idea if this is at all true but I do try to pick the smaller ones – this stuff seems to stay with you. I bet you try to find the small ones too now – I think they are sweeter if that is a possibility.

At home – cut the old stem or end off and cut each sprout in half.  Throw whatever amount you want in a bowl and add olive oil – if you have garlic flavoured oil use that. If not use enough oil (Extra virgin regular flavoured) to cover the sprouts in a thin layer and add garlic powder to desired amount  (I use lots) – that’s it. 3 ingredients.

Place on a single layer on a foil covered tray – I use the toaster oven for this one and broil until the sprouts turn a tiny bit black on the up side facing the element.  Make sure to watch these babies I have burnt my share of them (I eat them anyways because they are still tasty). they only take between 5-10 minutes in my toaster oven but it depends on the oven you use.

If you have left overs add lettuce (green leaf), avocado and some chicken with some toasted coconut, a bit more oil and apple cider vinegar for an amazing salad.

You got a 2 for 1 recipe today! Sweet.

Hope you like it!


Foot pain, Fallen Arches and Tight Muscles

So I put it out there on facebook and I did get a request for this article…  Its a pretty broad topic but suffice it to say that I do treat these things. Often.

Feet are amazing things really.  We walk on them all day and pretty much forget about them until they hurt.  There are a huge number of diagnoses related to feet some of the most common being plantar fasciitis, fallen metatarsal head (fallen arches), stress fractures, tarsal tunnel syndrome, turf toe, sesmoiditis and the list goes on and on and on…

From a simple sprain to chronic pain, there are a host of different solutions for different problems.

One of the things you hear associated with foot pain is often the prescription of custom made orthotics.  These little insoles can be amazing as therapy for the right foot condition. The drawback is that they are also expensive.  Although lots of people have plans to cover some or all of the cost, some people aren’t as lucky.  While they are a useful tool for things like fallen arches (fallen metatarsal heads) they aren’t the only solution.

When a patient comes to me with foot pain, fallen arches and tight calves I always prescribe strengthening exercises for the small muscles of the feet.  – these are easy to do exercises that will help support the natural arch and help a person retrain themselves to avoid the problem in future.  These include fun things like picking up marbles with your toes, and scrunching towels with the toes as well as learning to position the foot in the proper “short foot” position. (this one is much harder than the other two and really needs to be shown in person in a hands on fashion).

Also effective are muscle techniques such as ART for the muscles of the foot and scar tissue treatment if that is deemed to be a problem in the specific patient and adjustments of the small bones of the feet. If these bones are ‘stuck’ and not moving through their normal range of motion it causes inflammatory changes surrounding the joints and irritation and inflammation in those regions – this decreases the range of motion even further and increase the pain – all super easy to solve with a small corrective adjustment in the area.

The last thing I did want to mention was that if you have a fallen arch it tends to put a bunch of strain on the calf or back of the lower leg – the mechanics of the arch falling actually pulls on the gastrocs/soleus complex- those two giant muscles at the back of your leg attached to the Achilles tendon. This makes the muscle appear tight or reflexively be tight – stretching it will really do very little as the problem is in the foot to begin with  – correcting the arch with exercise, hands on treatment and an arch support (custom or otherwise) is the first course of action – this will likely improve the tightness in the back of the lower leg – if not then we can show some stretches to remedy this at that point but in general it corrects itself if we have done the rest of the therapy.

So, if you are suffering with foot pain please don’t wait any longer! Call us to find out how we can help you.

Essential Oil Lip Balm

This is the first full week of February and it kicks off Doctor with a Heart month at the practice.  So what are we doing that is different?  We are trying to do little things that show we care- care for the world, care for our patients and care for ourselves and families.

What are we doing that is special?

On February 1st I cut off all of my hair – ok well around 13 inches anyways – in order to donate to a charity that makes wigs for kids with cancer.  More on this later – I think we have chosen the charity we are just waiting to hear back on how to go about making the donation.

February also marks our patient appreciation month.  I have give aways for every patient who comes in in February – I have made (yes MADE) essential oil lip balm for everyone in this shortest, coldest, lip chappy-est month of the year. You can make your own too in case you miss it but just come in and get one from me to avoid the hassle.

Actually this lip balm was given to me by my friend Sjoukje Remark – she is an RMT and my essential oil guru.  She made it for me and later gave me the recipe.  I loved it so much I made it for all of you.  It has to be the cleanest, safest, chemical free-est and loveliest lip balm I have ever used.  I had to make some.

And of course I labeled it “Badass Chiropractic Lavender/Peppermint Lip Balm” so that is awesome.


Come on in and get one this February, your lips with thank you (lavender is amazing for the skin and peppermint feels tingly and fresh).

Here is the recipe:

1/4 cup Cocoa butter

1/4 cup coconut oil

1/4 cup beeswax

2 tsp calendula oil

2 drops vitamin E oil

60 drops of essential oil (I used 15-20 lavender and 30-40 peppermint)

Melt all ingredients over a double boiler and add essential oil. Pour into tubes and allow to cool. Cap and Label that Badass stuff.